Products Setting is another important aspect in the Nafhaa portal which used across modules. Moreover, it majorly affects the entire inventory itself.
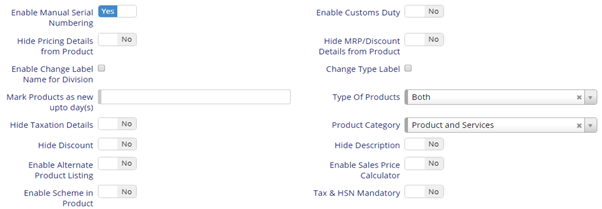
- Enable Manual Serial Numbering – This will enable the serial numbering to the products in Transactional modules like Sales, Invoice, Quotation, etc. are few to name.
- Enable Custom Duty – This will enable the custom duty field which is applicable if the product is imported from other country other than the source country.

- Hide MRP/Discount Details from Product – This will hide the MRP and Discount Percent and Amount fields from the Product page.
- Enable Change Label Name for Division & Change Type Label – These two controls are deprecated and the same renaming a field can be done using the translation module.
- Hide Pricing Details from Products – It is meant for POS and Stock-In modules where only inventory is to be managed irrespective of pricing. So, hiding the pricing will be a good way to process the products.
- Type of Products – It is a type of drop-down which have one type selected from three type as – Both, Parts or Finished Products.
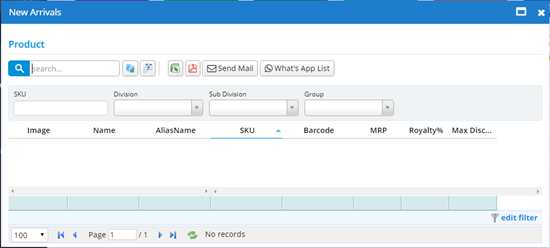
- Mark Products as new up-to day(s) – When this value is set the newly arrived products will be treated as new until the specified days are over. The grid show below can be accessed via Service Dashboard.
- Product Category – As the control name is self-explanatory here you can select the type of Product. Here you can select either of option like Product or Product and Service.
- Hide Taxation Details, Hide Description and Hide Discount – As the prefixes shown for each of the controls are quite self-explanatory. The first-one will hide the Taxation details from the Product Page. The second-one will hide the Description field from the product page if you don’t want to add descriptions to your product. Finally, you can also hide the discount fields like Discount percent and Amount. If you opt for this option you won’t be able to offer discounts while selling the product and you will have to manually specify the same.
- Enable Alternate Product Listing – This will enable alternate product listing for the selected products. This will enable the user to suggest the customer an alternate product if the currently view product is unavailable due to any reason.
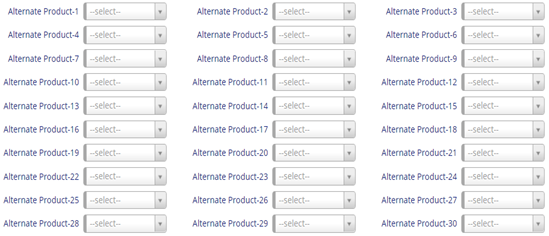
Enabling this control will enable a new tab in Products named Product Alternates. We have given 30 options where you can set product alternatives for a single product.
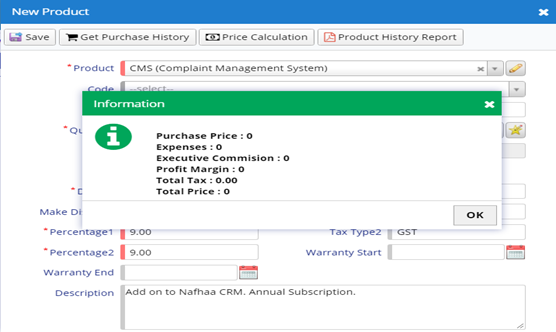
- Enable Sales Price Calculator – This will enable a button named Price Calculation in sub-module called Products under Sales, Sales Order, etc are few names. This will display total amount expected when all the additional expenses are added to the actual amount of the product thereby enabling the user to make quick decision while setting the price pointers.
- Enable Scheme in Product – This will enable a simple Scheme field in product page. This will enable the user to bifurcate the product under various schemes.
- Tax & HSN Mandatory – As the name is self-explanatory it will make the Tax fields and HSN Fields compulsory while saving the Product.

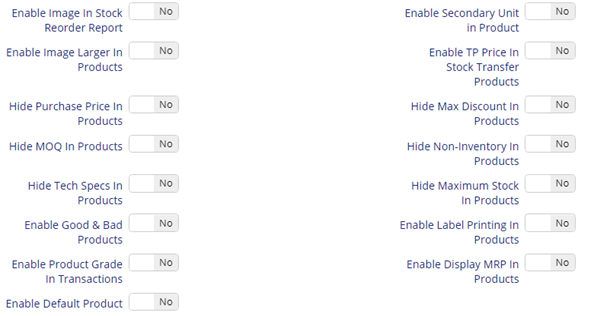
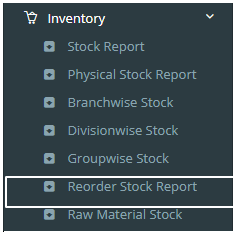
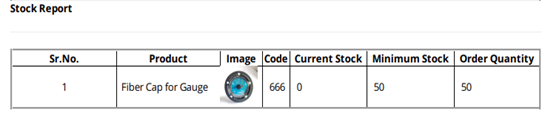
- Enable Image in Stock Reorder Report – This will display an image in Stock Re-order report. This will help the user to see which product they are going to re-order. You can access this report from the following menu item.
- Enable Secondary Unit in Product – This will enable a new field in Product which will help you to map your product to other type of Unit while selling the same to the customer. It could happen that you could receive the same as one box but it may contain 12 pieces and which will be sold as one piece each to the customer.

- Enable Image Larger in Products – This will make image look bigger in the Reports or Grids so that you don’t have to open the record and view the product image in bigger view.
- Enable TP Price in Stock Transfer Products – This will fetch the TP price instead of actual cost of the product while transferring the products using Stock Transfer Module.
- Hide Purchase Price in Products, Hide Max Discount in Products and Hide MOQ in Products – As the prefixes to each control explains everything. But, here, we would like to make sure you don’t miss anything. The first control will hide the Purchase Price field in Product and turn this ON if you don’t want to track the Purchase price for the product. The next control will hide the Max. Discount field from product. The last field is domain specific and it will be hidden by default.
- Hide Non-Inventory in Products – This will hide and skip products which are not for sale and hence, they need to skipped in Transactional modules like Sales, Sales Order, etc. are few to name.
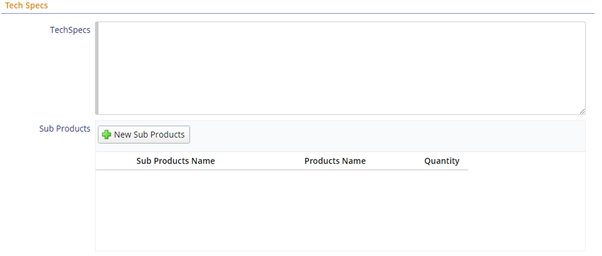
- Hide Tech Specs in Products – This will hide Tech-Spec field from Product page if you are not interested in specifying the technical details of the product.
- Hide Maximum Stock in Products – This will hide the Maximum Stock field from the product page. This fields ensure you that don’t overload and over invest on the product and blocking the purchase or other operation on this product.
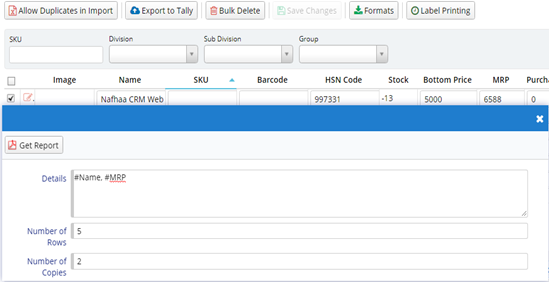
- Enable Label Printing in Products – This will enable a feature to print the Product details on stickers. Below is the image for more explanation.
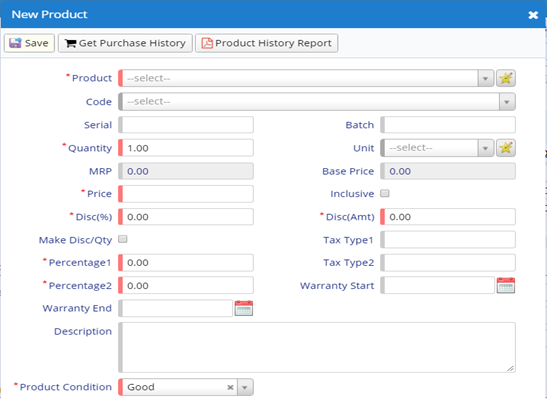
- Enable Good & Bad Products – Enabling this will help the CRM user to mark the product whether it is Good or Bad State. This option is visible in all the transactional modules like Sales, Sales Order, etc. are few to name. It will also help you later generate report of Good and Bad Stocks.
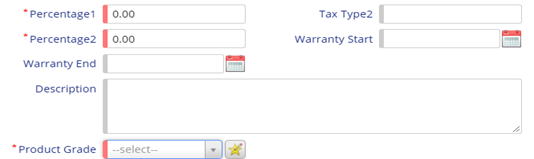
- Enable Product Grade in Transactions – This will enable Grade field in all the Transactional Modules like Sales, Sales Orders, etc. are few to name. This will help the user to identify the Product Grade.
- Enable Display MRP in Products – As the name suggests, enabling this will display MRP for the Products selected in any Transactional Modules or Products Page.
- Enable Default Product – Enabling this control will provide a new control in Product’s page where you can set one or more product as default. They will be considered in Transactional Module like Quotation, etc.
- We have seen all the possible settings provided under Company Details for this module. Now, let’s delve deeper in this module by actually seeing what we have in the store for us.
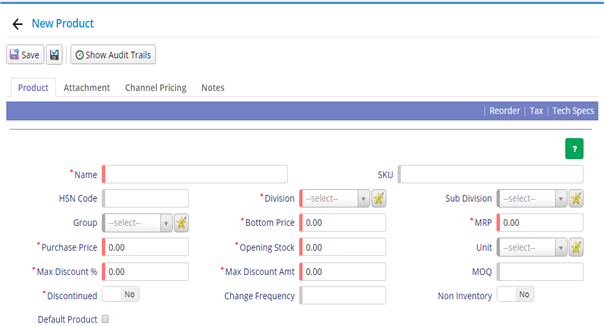
The first row contains buttons like Save and Apply-changes. Each of them has an important work to do. When you make changes and hit Apply-Changes it create a new entry and remain on the same page but on the other hand if you Click Save it will perform the same action but after creating entry it will return back to the Grid showing all the Product List.
The second row will contain all the Tabs provided in this Module.
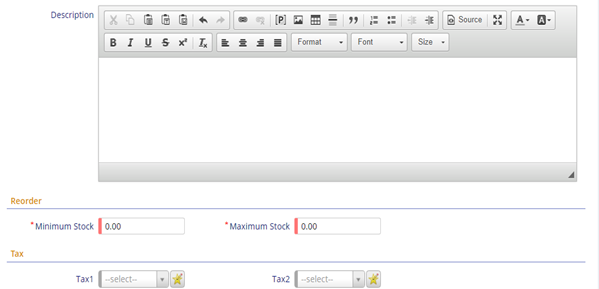
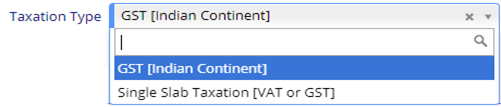
- Product Tab – It is the most important tab in this module as it deals with various aspects of the Products like Specifying the Division, Sub-divisions and Group. This will help the user to bifurcate the products accordingly. Based on the settings provided in Company Details as show in Figure 60 and 66. Upon enabling these settings, some components will be shown or hidden or they may be marked compulsory while saving the Product item. Some Master fields like Division, Sub-divisions and Group have star like icon which mean you can add new entry on the fly and they will be set automatically. Going further in the same tab we will find fields like Description where you will define the details of the product, next are the Minimum and Maximum stock fields where you will se the values respectively and finally, you have the Taxation fields where you will set the Tax type applicable for the product. You might see only one field if you have set the Taxation Type to Single Slab in Company Details.
- Attachment – This tab will help you to upload the Image for the selected product which can be displayed in Grid, Invoices or Reports. It will also help you to identify the Product easily.
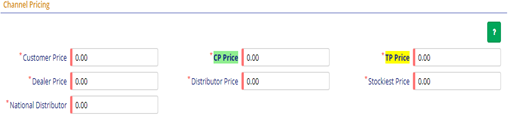
- Channel Pricing – Channel pricing will be used to portrait the product based on the Channel of your customer. You can set different price values for each Channels. Following is the image of Channel Pricing Tab.
- Notes Tab – Using this tab you can record additional notes for the product. Following is the image for Notes section.
