Mailchimp allows you to easily create newsletters of varying types and then provides simple options for sharing them on social networks such as Twitter or Facebook, making it your own personal platform for publishing your newsletter. Build a list of the people whom you want to market your products to, and save the list for use later on, and create custom templates for your products so that you do not have to rewrite mails again and again.
People who maintain a newsletter will find Mailchimp to be of a lot of help, as it helps them save their drafts and formats quite easily. Mailchimp also helps you track your results so you can check the responses that you receive from your clients.
On clicking the Home item, you will the given the following screen –

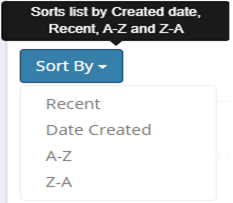
This is the home page for MailChimp module. This will list the all the lists you have created on MailChimp as part of promotion and marketing. You can sort the existing list using the Sort By option which is provided with the following options at your disposal.
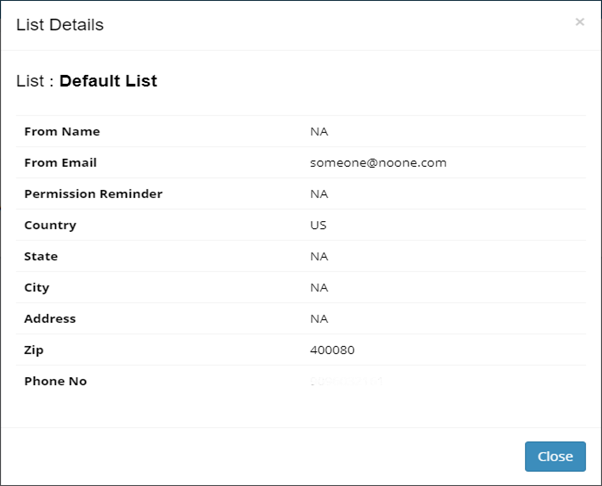
Since, we have a list of Promotions and Marketing displayed as a list and if you want to have a look at the details of the same then, you can click on the List’s name and you get the following dialog detailing the List’ s information.
After looking at the information dialog, we now move to the next column of the list where you can view subscribers name and their other details like when they were added. Additionally, you can delete the subscribers if you want using the Delete button at the end of the row.
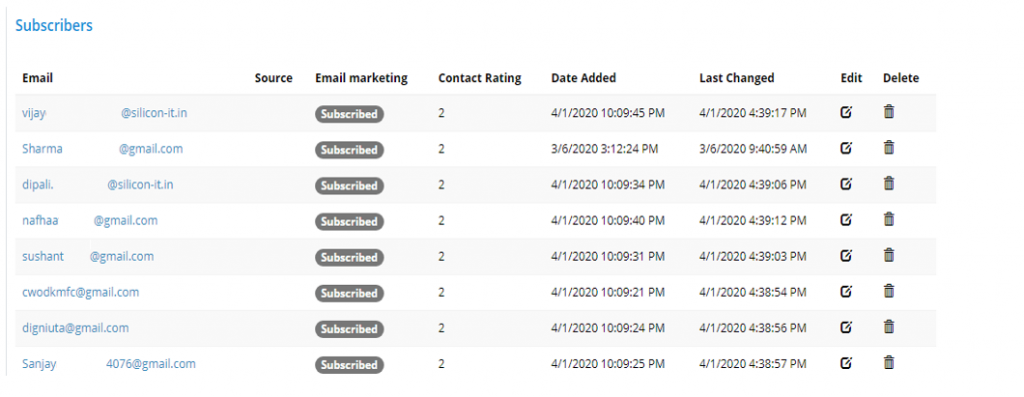
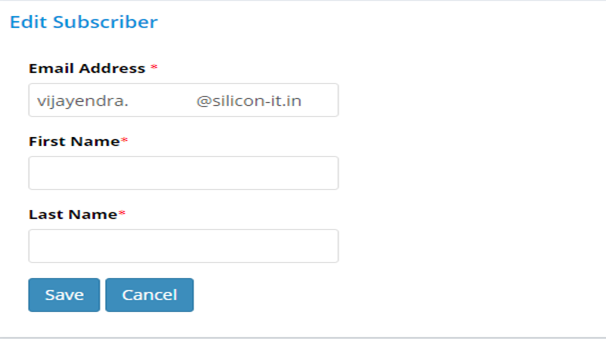
As you can here, you also edit the subscriber’s basic details if you want to.
Considering the Subscriber page, the next two columns are Number of clicks and Open. The Number of Clicks will show the percentage of people clicked the email link to view the content and on the other hand Number of Opens will show the percentage of people opened the email and read the complete content.
Finally, the last three buttons are for managing the lists like the Add Subscribers, Edit and Delete button. The Delete Button will delete the lists and its subscribers from the MailChimp server. You perform this action very cautiously as this will lead to loss of data. Nafhaa Platform in no way will be responsible for data loss which is stored on Third-party locations.
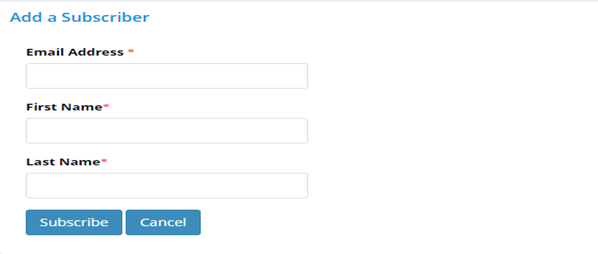
The other button is Add Subscriber, using which you can new subscriber to the current list using the following page.
The other button is the Edit button, which deals with modifying the content and other details.
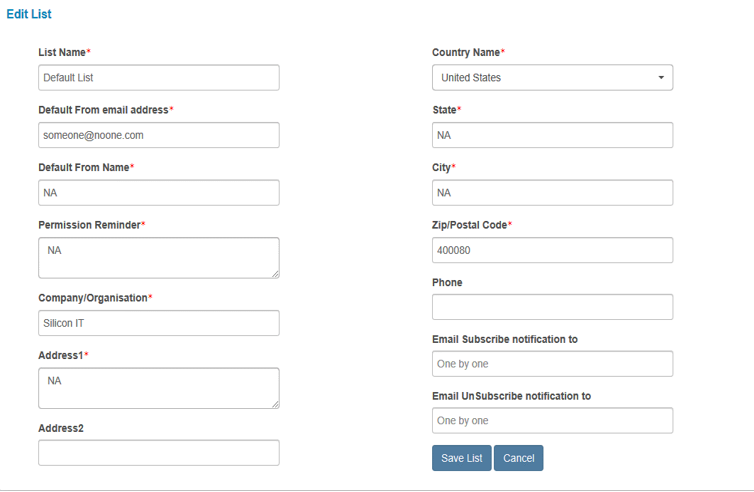
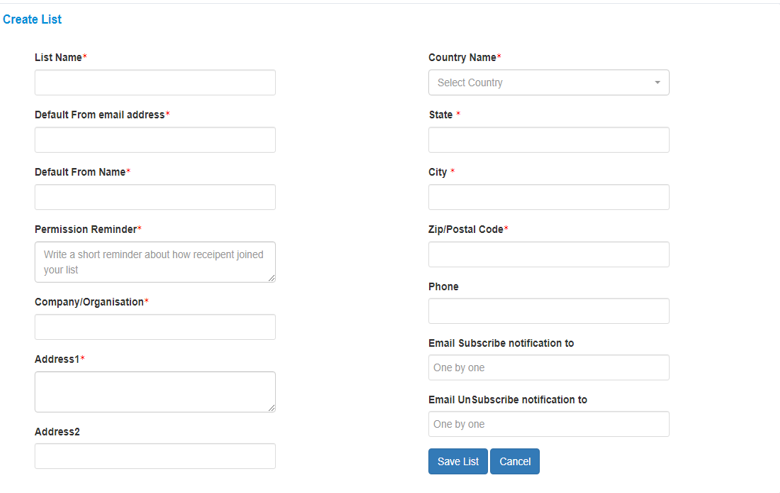
Using this page, you can edit and update the list’s details. Upon saving the details will be update to MailChimp Server. Finally, at the top-right you have an to Create a new list which solely depends on the type of subscription you have purchase at the MailChimp. This sums up the Home page for MailChimp.
The next page we are looking at is Creating Campaigns page using which you create Campaigns from promotion and other marketing activities.
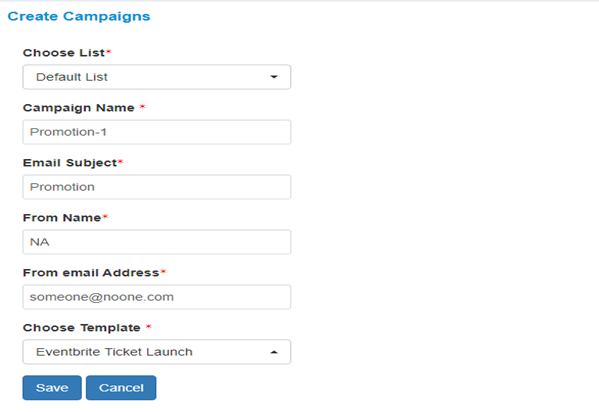
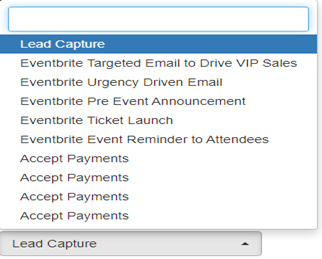
Here, you will select a list from drop-down which you have created using the Create List page where you add subscribers. Fill-in the Campaign Name, Subject, From Name, the Email address using which the mails are to be sent to the subscribers and finally select template which you have created on MailChimp portal. A sample list of Template is as shown in the image –
This list will be different and it will be based on the templates that you have created on the MailChimp portal.
The next action in the menu is Templates, using this you can create new Templates using the tools provided by MailChimp portal. Also, you can use the existing templates which are provided by MailChimp.
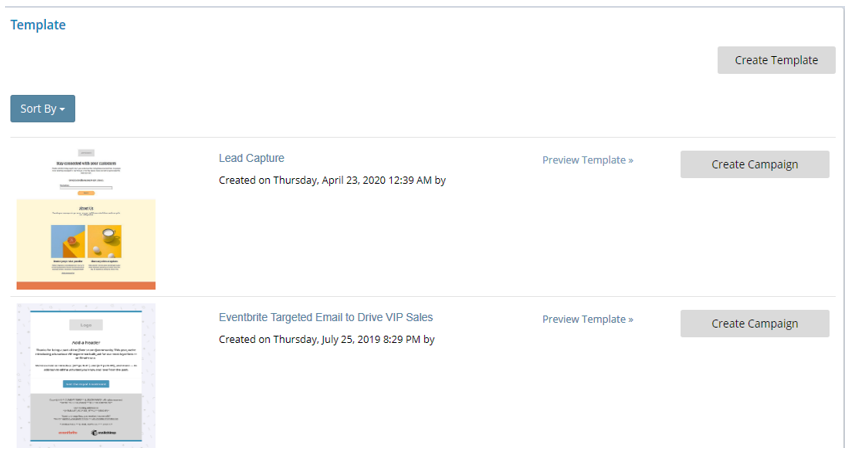
You can edit the template, by clicking the Template name and you will be re-directed to the MailChimp Login page where you can modify the template and then save it. Nafhaa Platform will fetch the updated details for the template upon refresh. You can also, create a new Campaign directly from this page itself and you will be re-directed to New Campaign page. Additionally, you can preview the Template by clicking the Preview Template link.
Lastly, you have the Campaign report page where you will be presented with the detailed report for the Campaign that you have executed over the time and which help you get the insight about the Campaign.
This sums up the MailChimp Module. We hope that you have fair bit of knowledge on how to use and handle the MailChimp Module.