MailChimp is an online platform for Marketing and promotion. For more information, you can check with MailChimp portal – https://mailchimp.com/. Now, let’s look into this configuration module.
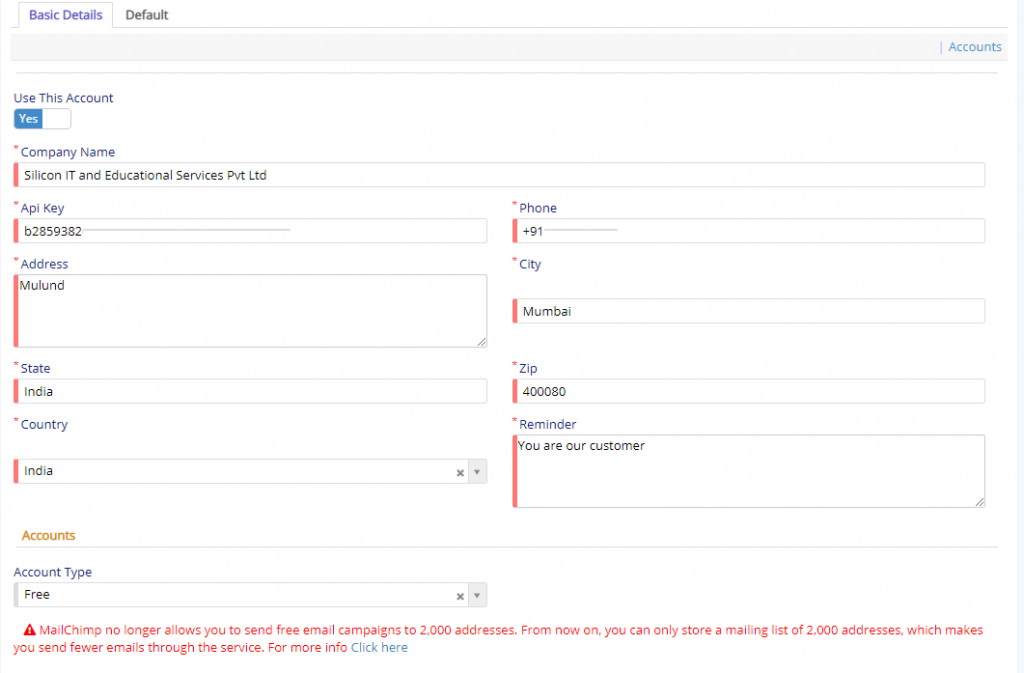
As you can see above in the image you have certain things to be configured to enable MailChimp on your portal. You need to specify all the fields which are marked as Red Star, of which API Key is the most important of them as it lets you to use the MailChimp platform to market and promote your range of products available in your organization. To obtain API Key you need to visit the MailChimp portal, create an account and then obtaining the API Key. Finally, you have to mark the account which is to be used by setting the switch named Use this Account.
Since MailChimp have updated their usage policy which can read on https://sendpulse.com/blog/mailchimp-free-plan. This will be applicable if you are using Free Type of account.

If you are using the Free type of account you will be able to create One Default List only as per new usage policy laid down by MailChimp.

But if you are using Premium account which allows you to define separate list of each type of Module. There will be no Default Account. But in Premium you have catch and that is you can create a single list or you can change to multiple lists. Each list will have three fields like From Email, From Name and Subject. These fields are common across the list formation.