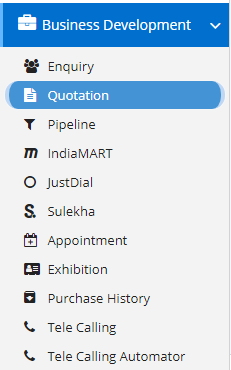
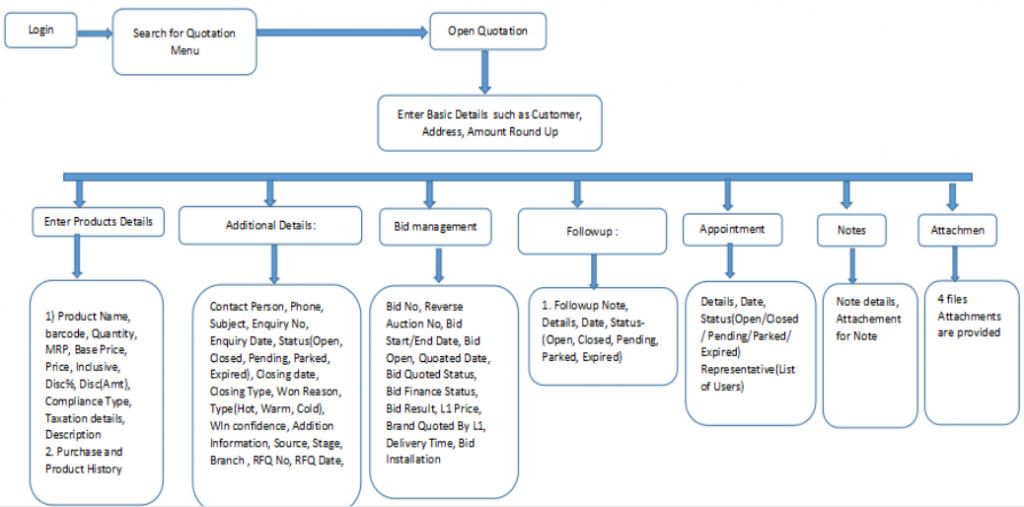
After getting along with Enquiry and after much needed discussions it’s time to provide the customer with a Quotation which will contain the further details of Products such as Rate, Discounts, Taxes, etc. This Quotation will give the customer and clear picture of total amount that he/she is going to spend on the product he/she enquired about. Even Quotations go through various revisions for which you need a Follow-up section to perform the same. Enough of intro, let’s move forward with this Module. This module is a part of Business Development Module and this can be accessed via Business Development–> Quotation.
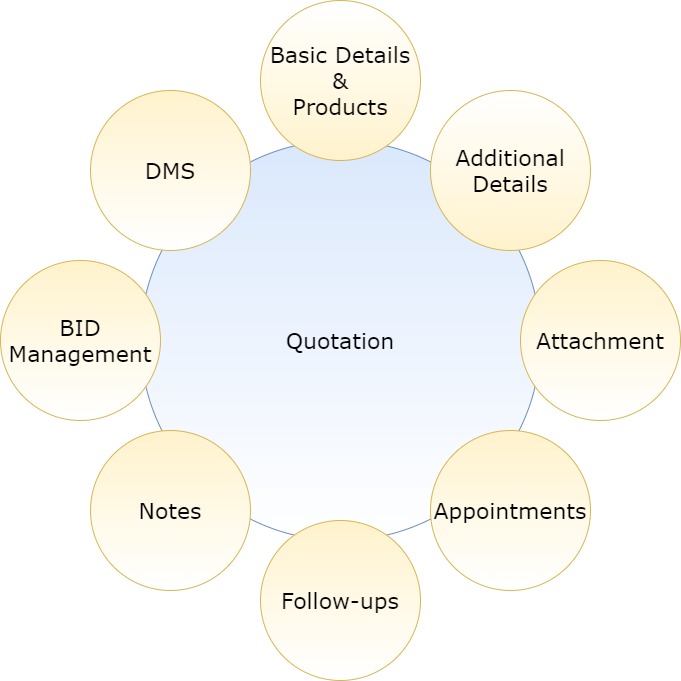
Below is the generalized Quotation module structure.
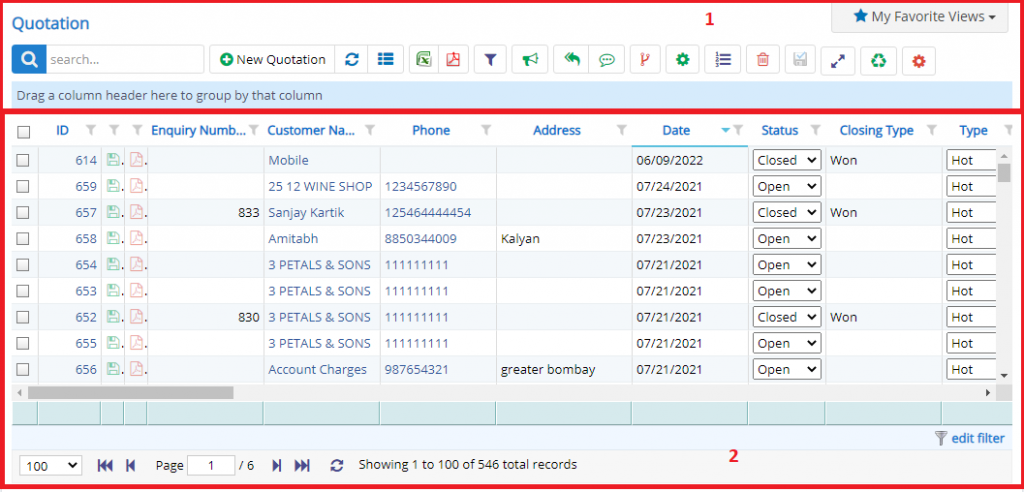
- Annotation – 1 shows few elements like Search, New Enquiry, Refresh and Column Selector (will describe later in the chapter).
- Search Text box is used to search a specify or similar users form the list below. When you start entering characters it will start searching within the Enquiry Module.
- Refresh Button is used to reload the Enquiry Grid or Table so that the changes which are made to any user will be reflected on the grid.
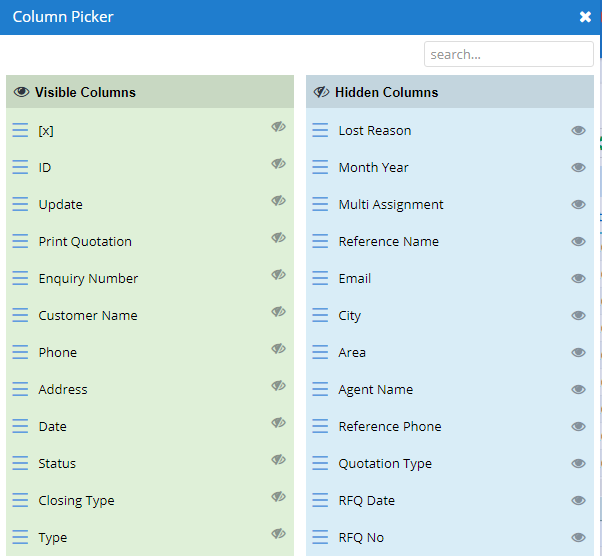
- Column Selector is used to select one or multiple columns from the range of columns. Following is the image for the Column selector. Note – The columns shown in the filter will keep on changing as and when Nafhaa Platform makes changes to the module.
- The next two buttons are for downloading the Quotation Grid as Excel or a PDF. These files will contain all the columns are which are visible in Contacts Grid.
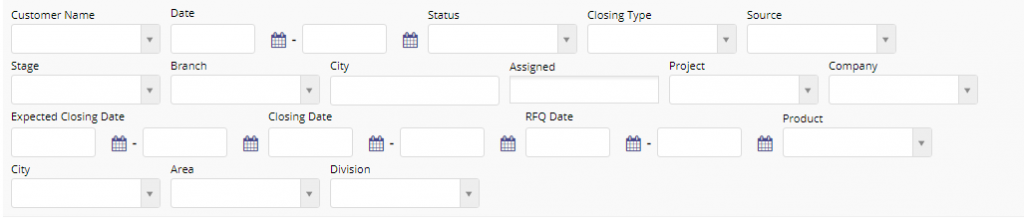
- The next button will show you the Filters. There will be a question in the mind of the readers, where are the filters? Yes, they are present and they been kept hidden because there are too many filters provided to filter out the records which you want to see. You have to click Show Filters buttons to reveal the filters supported by Quotation Module. Using these filters, you filter the Quotation Records and view only which are required. Filters with drop-down feature for the fields like Customer Name, Status, Closing Type etc are few to name. On the other hand, fields which deals with Dates are given two fields as a part of Date range selection. You can use these filters in combination to filter the records.
- The next button is for MailChimp using which you run marketing promotions using MailChimp Platform. More detailed explanation will in the Chapter named MailChimp. For more information, you can check with MailChimp portal – https://mailchimp.com/
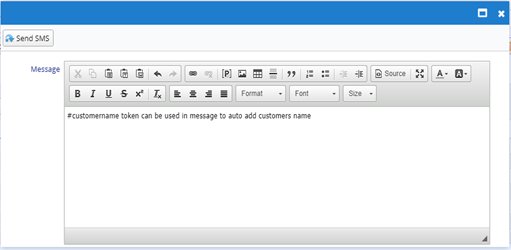
- The next button is for Bulk SMS which is used to send promotional SMS to the selected customers. To select the customers via Quotation, we have given a checkbox to select the same. There might be some keywords included which we expect the user not to remove those. Now, the question arises “What are keywords and how to identify them?” Keywords are those which start with # for example – #customername. But when you send SMS the keywords will be replace with appropriate values. Following is the dialog which will appear where you can add the details for SMS.
- The next button in SendGrid, this is similar to Mailchimp which is marketing platform.
- Next button is Detailed View, which will allow, you to view all the Products which are Quoted across different Quotations. This button is permission based.
- Bulk Delete will allow you to delete multiple records in a single go. The button will be visible only when permission is granted.
- Reset Preferences button will allow the user to reset the modules, columns customizations applied by the user to the module.
- Settings button will invoke the Quotation Settings which will allow you to configure the Quotation module based on your business requirement.
- Annotation – 2 shows the list of all the Quotations that have been created where the user can click record to open it and edit it if needed. This was all about the Quotation Grids introduction now let’s get inside the module.
We can see lots of buttons on the top and each of them have specific operation defined for them to perform. These buttons will vary based on the modules opted by use during deployment of your portal and based on the settings you have enabled in Quotation Settings module.
We will start explaining with the button rows first and then move on to the tabs.
- Starting from the left is the Update button which is used to update the changes that you have performed in any of the Tab. This button will change to Save when you are creating a new Entry.
- The Next button which is similar to Update button but the only difference is that, it performs the Update operation and remains on the same page. But the later Updates or Save and returns to the Grid displaying List of users. This button will change its meaning when you are creating a new entry. It will be called as Apply changes.
- The Next button is for Delete, this will delete the selected record from the database.
- Clone button will clone the currently opened record so that you don’t have to fill all the fields again thereby reducing your work of doing data-entry. But, this button is permission based and will appear only if the user has the permission to perform that action.
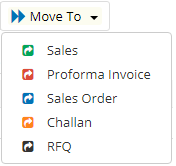
- Sales – This will move the Quotation to Sales Module for further processing. This is a permission-based button and will be only visible when permission is allotted to user.
- Proforma aka Invoice – This will move the Quotation to Proforma aka Invoice Module for further processing. This is a permission-based button and will be only visible when permission is allotted to user.
- Sales Order – This will move the Quotation to Sales Order Module for further processing. This is a permission-based button and will be only visible when permission is allotted to user.
- Challan – This will move the Quotation to Challan aka Delivery Challan module for further process. This button is settings, permission and module availability dependent which means if you have Delivery Challan module deployed to your portal and finally if the permission to the user is allotted then this button will be visible to the user.
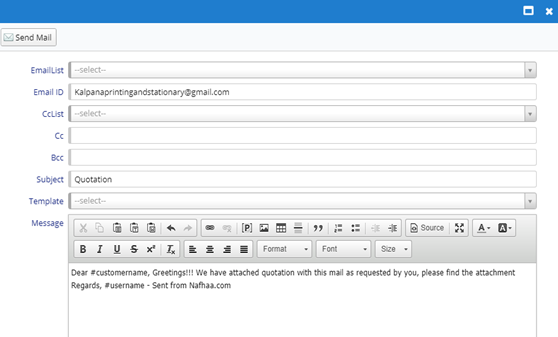
- Mail button will invoke a Mailing dialog using which you can send mail to the selected customer in Quotation. Mail dialog will look as below. Here, you can specify the other email IDs if you want additionally, you can specify the CCs and BCCs using comma to separate multiple email address.
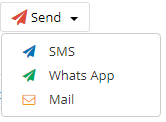
- SMS button will send a SMS to the selected contact containing the information about the Quotation.
- WhatsApp button will allow you to send Quotation details to selected contact directly to Customer’s WhatsApp. You will need to enable Gupshup or Twilio integration to use this feature. Check respective settings module.
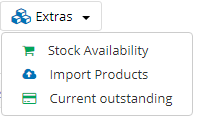
- Stock Availability – This button will invoke a new page showing the availability of the product currently added under the existing Quotation. This will give the user a fair idea of the product status.
- Import Products – This will invoke a new file selection dialog to select and upload a file containing Product list. Selected file will be uploaded to the currently opened Quotation. This is useful, if you are uploading a lot of products.
- Current Outstanding – This will display the current outstanding status of the selected contact in Quotation.
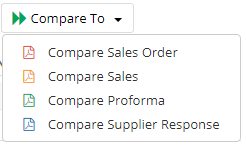
- Compare Sales Order – This button will invoke a comparison page which will contain the comparison done based on the current Quotation. Report will look something as shown below.

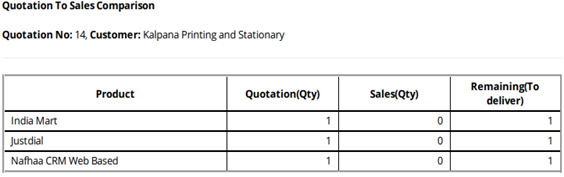
- Compare Sales – This button will invoke a comparison page which will contain the comparison done based on the current Quotation. Report will look something as shown below.
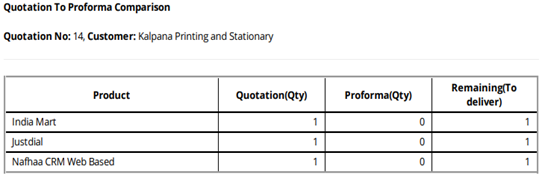
- Compare Proforma aka Invoice – This button will invoke a comparison page which will contain the comparison done based on the current Quotation. Report will look something as shown below.
- Compare Supplier Response – This will invoke a new response page which will be compared with the RFQ Responses received from the suppliers. If, you don’t use the RFQ module then you can safely ignore this button’s functionality.

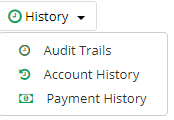
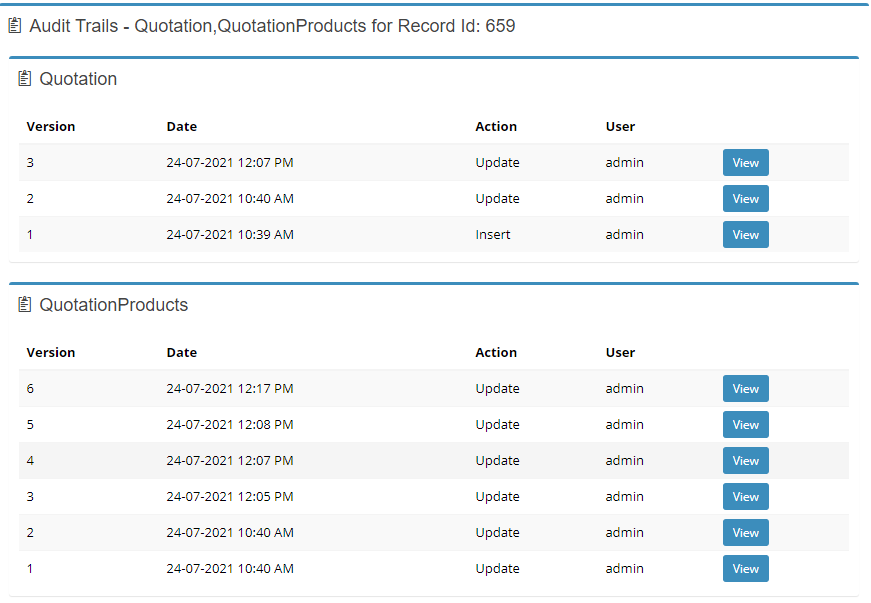
- Audit Trails – Audit trails option will display you all the modifications happened to a specific record which is opened by the user. This button will be visible only when the permission is granted to view the data. Audit trail will look something as shown below.
- Account History – This will display a detailed history of selected customer with current status of the selected customer wrt to Open Enquiry, Closed, etc are few to name.
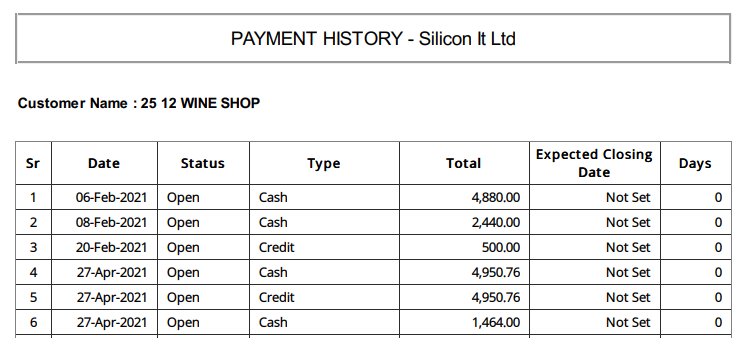
- Payment History – Payment history will show the details related to previous payment wrt all the invoice generated against the select contact in the Quotation. A report will look something like as shown below.
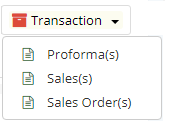
There are numerous options like Sales, Sales Order, Proforma which will open an independent grid in relation with the opened Quotation.
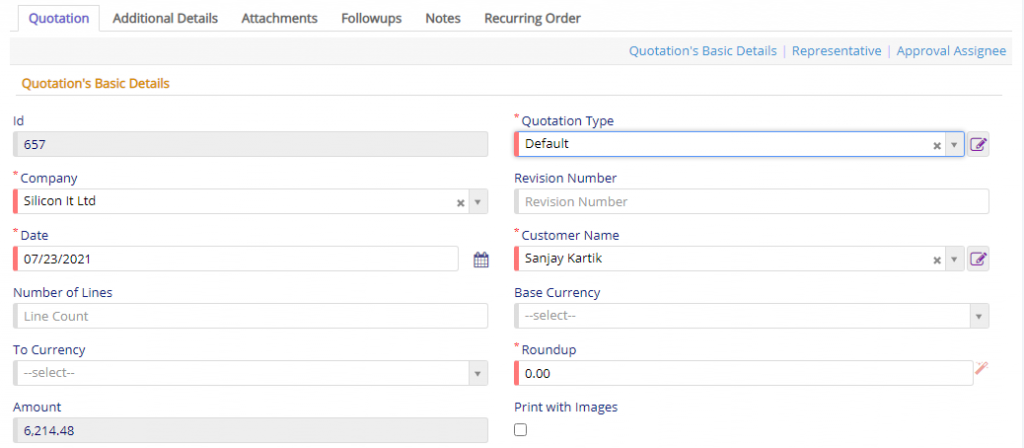
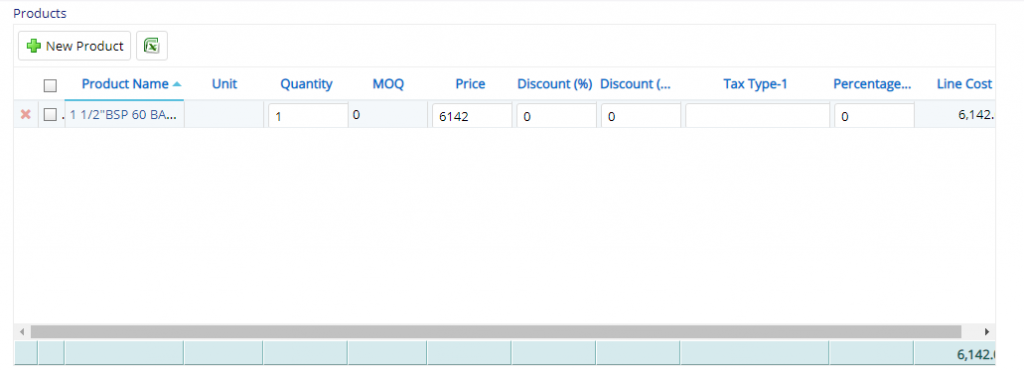
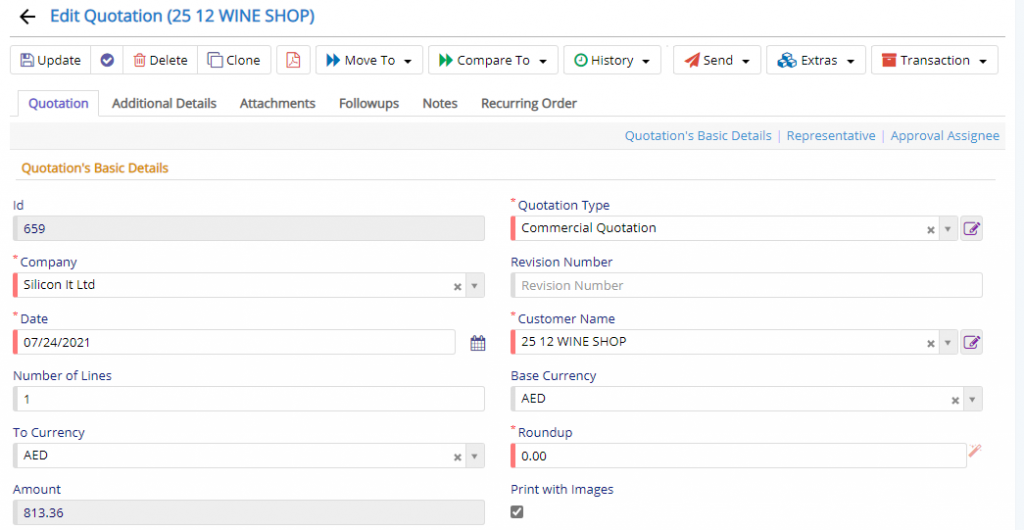
- Quotation is the first tab which will collect basic information such as contact’s name, date on which the Quotation was generated and to which person it is assigned. This field will be read-only or hidden based on the type of permission assigned to the user. Apart from collecting the basic details, quotation do contain field for selecting the product. On clicking the New Product button, you will be given the following dialog where you can select the product that you want to include in Quotation.
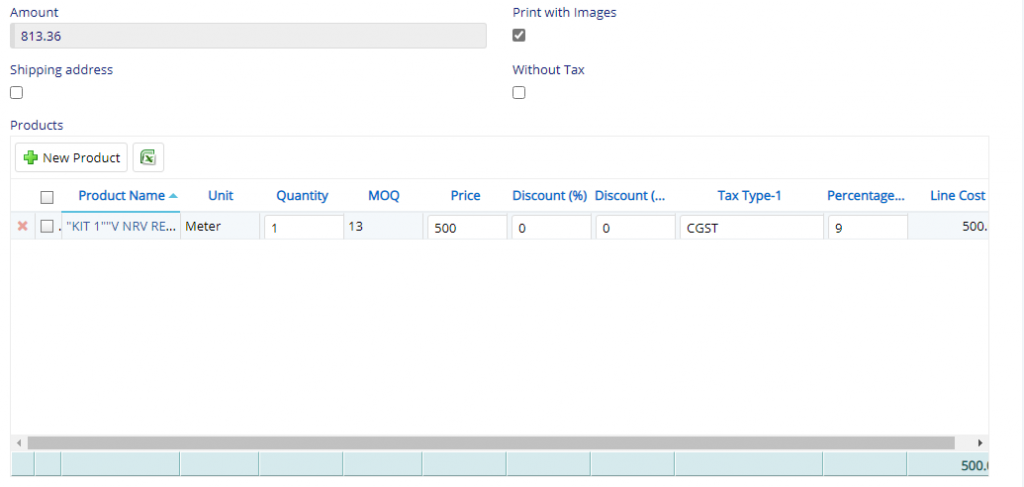
- Number of lines, Print with Images and Without Tax settings (if visible) are called as Per Quotation settings which are applicable to a single Quotation. Number of lines are used to add blank lines which act as padding to the Quotation while generating PDF or print. Print with Images will include the Product images if, available in the Quotation PDF or print. Finally, Without Tax settings (if visible) will hide the taxation part from the Quotation PDF or print.
- In Products, you have a small Excel icon which denotes that you can upload the Product list using an Excel file to the current Quotation. You can use this feature if you have many products to be entered the current Quotation. Please note that Nafhaa Platform has restricted 500 records per Excel file to avoid congestion on the Nafhaa Platform as there are many other users and clients using the platform.
Here, you can select the product which you want to include in the Quotation. Along with it you can also check with the Purchase History of the product by the clicking the button with the same name. Upon clicking, you will get the following Information box stating the details.
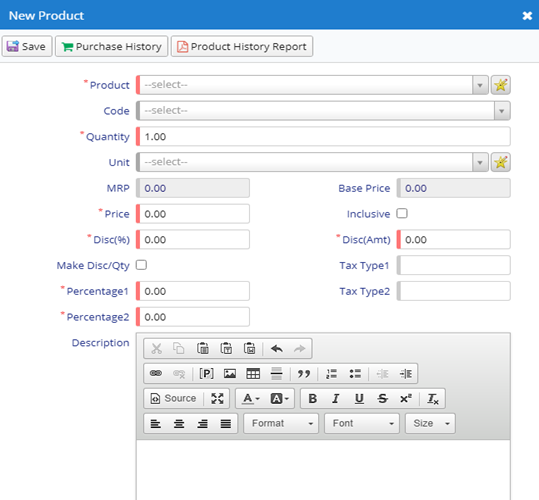
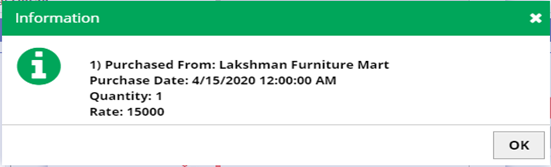
This will invoked when you click the Purchase History button.

This report will be invoked when you click the “Product History Report” button. This report will show, the product status which will include all the references across the transactional modules.
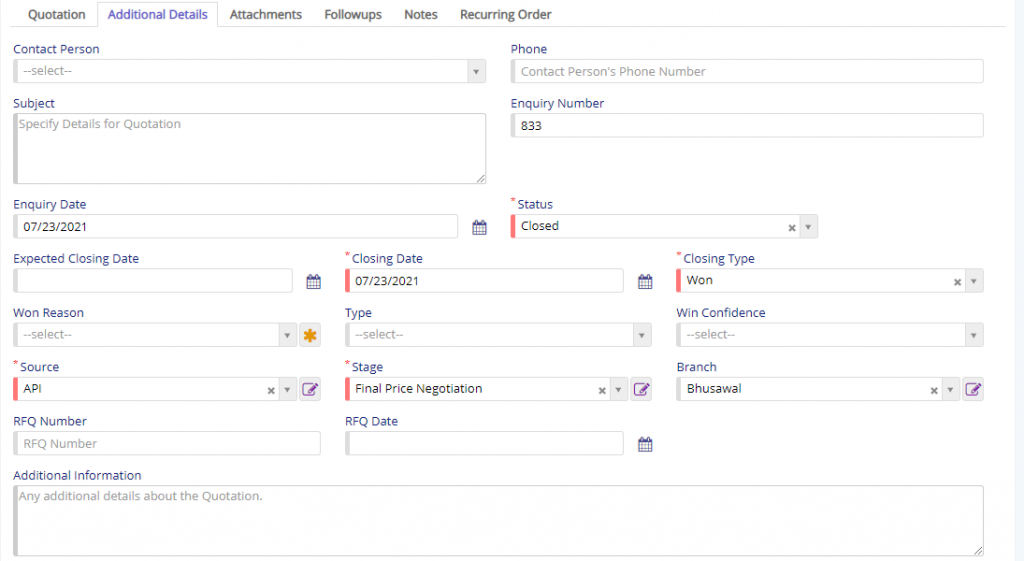
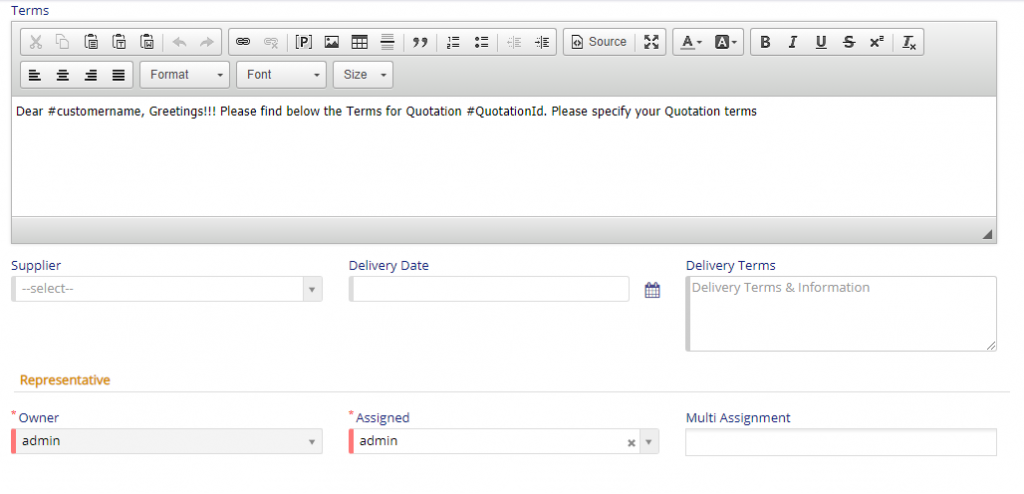
- Additional Details tab deals with details which are essential wrt to tracking the Status, Stages in which the Quotations are at the current instance. You can set the expected closing Date of the Quotation. Source fields denotes from which source the Quotation has been generated wrt Enquiry which was acquired. Using this field, you focus on Marketing as this field will give you a fair idea on which Source or Channel you need to focus to acquire more Enquiry and later which can be converted to Quotation and try to close it. The next two fields are Type and Win-Confidence which will help you to understand the Type of Quotation you are dealing with and what are the probability of winning the Quotation. You can also set the Branch field which will help you to bifurcate the Quotations across branches. Additional Info is used to add details provided by the customer regarding the product(s). Similarly, an extension of this field is under Notes Tab as you can see below. There, you can multiple notes provided by the customer during discussion.
- If your Quotation has been generated from Enquiry i.e. a Move To operation has been applied to the Enquiry then you will see the Enquiry Number and Date field set to the Enquiry’s Number and Date. Similarly, you will see RFQ Number and Date field if it is moved to RFQ Module. With these fields, there is a proper mapping between Enquiry <–> Quotation and Quotation <–> RFQ.
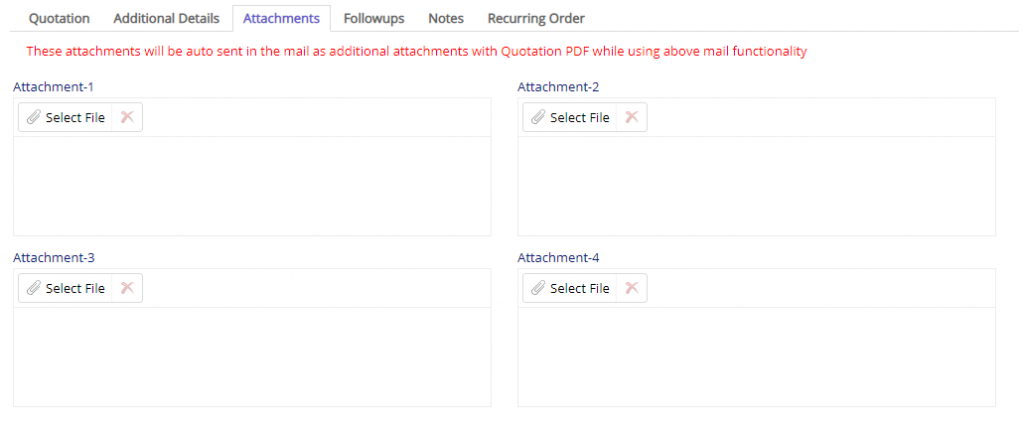
- Attachment Tab deals with Additional files which you feel is important for the customer. These attachments will be sent to the customer along with the Quotation PDF when an Email option is used.
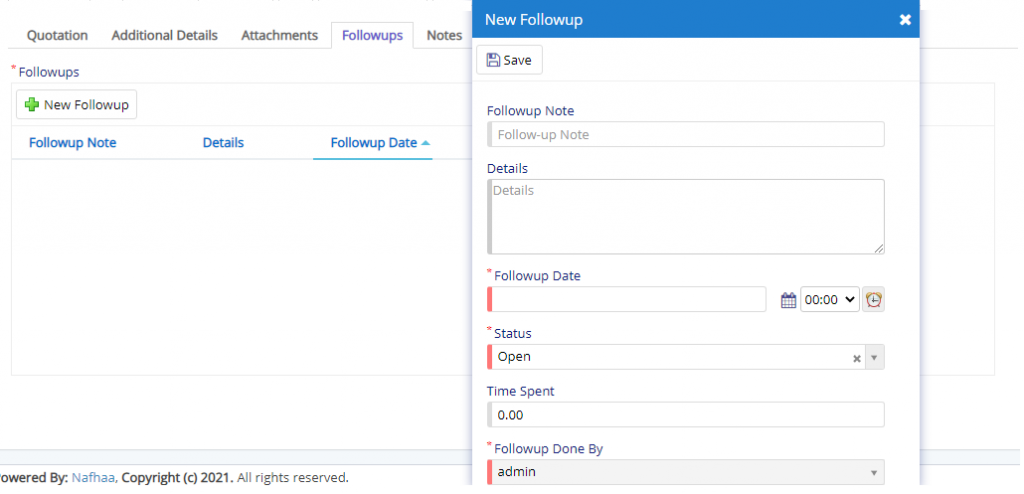
The Follow-up tab is for setting up Follow-ups with the current customer for the current Quotation. You can set multiple follow-ups for the current Quotation. As you can see in the image, we have Grid which will show you the number of follow-ups happened for the current Quotation. Using the New Follow-up button, you can add new follow-up for the current Quotation. On clicking the button, you will be given with a new dialog as shown above where you can set the Follow-up Note and the Details for the Follow-up along with the proposed Date and Time with the Status. When the Follow-up is done with the customer or client users are expected to update the Follow-up accordingly. For Automation of Follow-ups Quotation please check with the point above in Settings section.
DMS Tab will allow the user to add documents related to the Quotation.
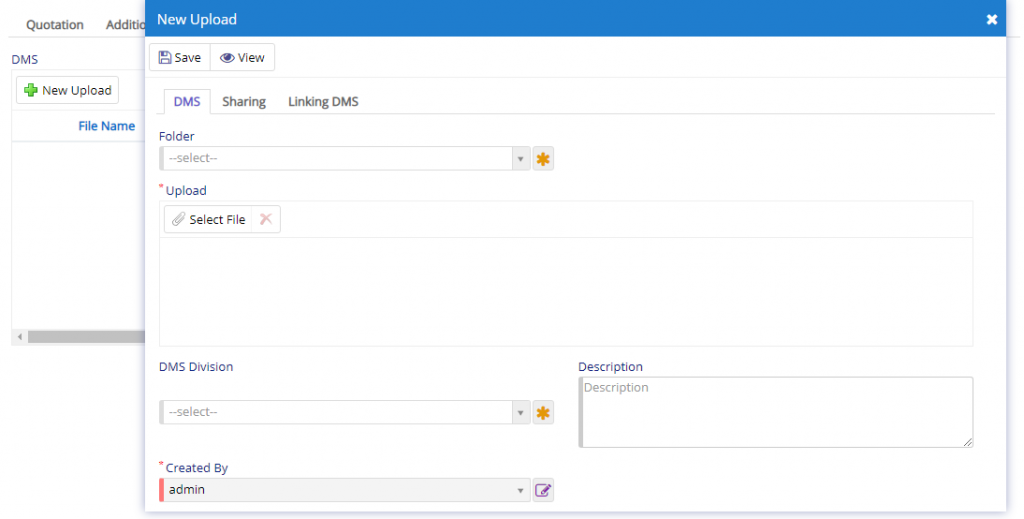
Here, can upload the file, assign Folder level under which it should be uploaded. If more bifurcation is needed, then, one can use DMS Division field. Description field can be used to describe the file in more informative way.
Under DMS, Sharing Tab will be used to share the document to the pears or users with validity specified.
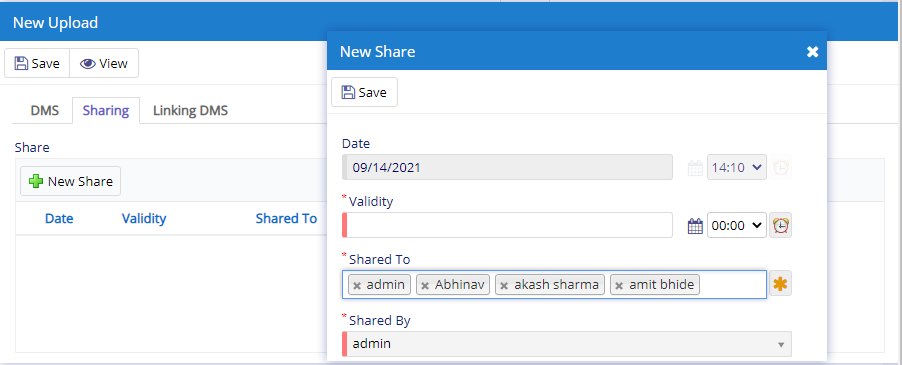
As shown here, the user can select multiple users with whom the file is to be shared. Validity field will put restriction on visibility of the file until the specified date has been elapsed.
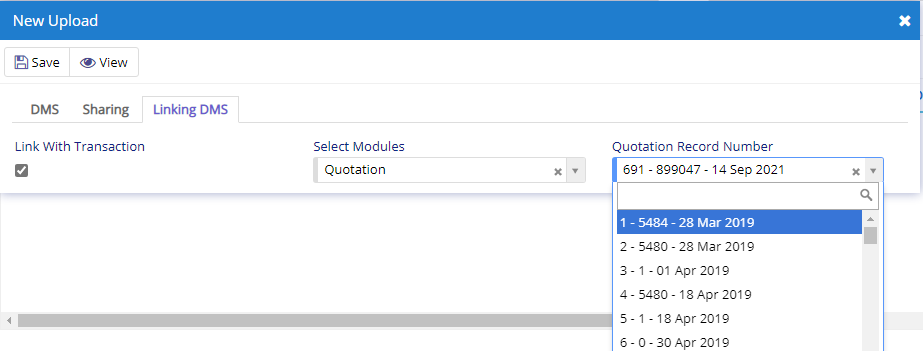
Under DMS, Linking Tab can be used to link the DMS to current record.
BID Management
BID Management tab is useful for managing the BID that are done wrt to the records that are entered. This tab will visible only when the setting is enabled in respective module.
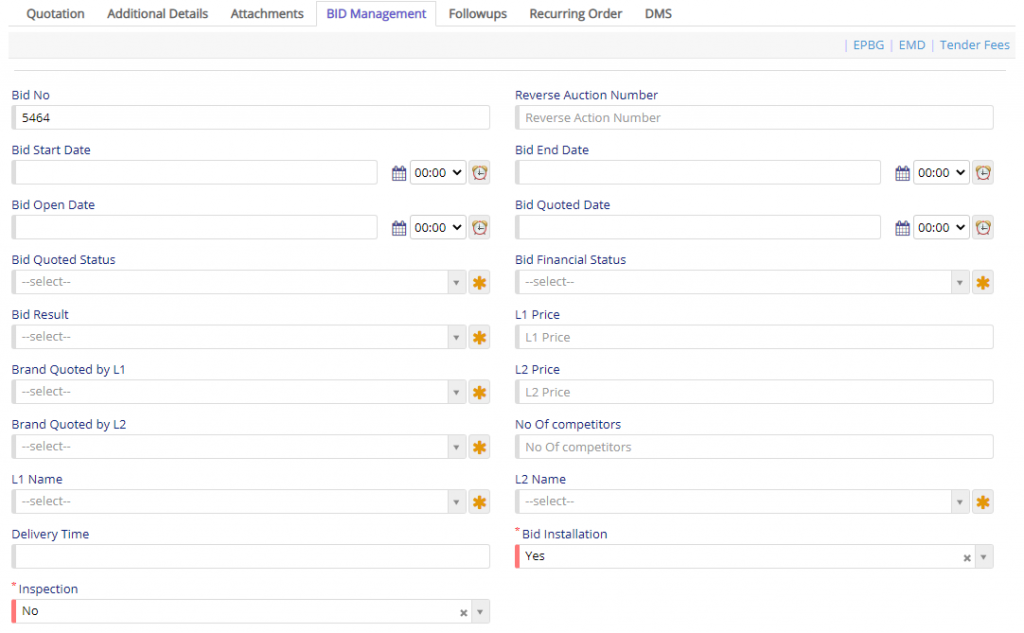
- BID Number will allow the user to specify the sequence number for the received BID.
- Reverse Auction Number will allow the user to specify the RA number which is generated.
- BID Start, End, Open and Quoted Date fields will allow the user to specify the required dates for the BIDs to process.
- BID Quoted Status, Financial Status Result fields will allow the user to specify thy status of Quote along with the Financial Status and finally with the results status for the BID. This will allow the user to manage the BID.
- L1 Price, Brand Quoted by L1 and L1 Name deals with the pricing, brand assigned to BID and finally, the name of L1 person or entity who is handling the details related details for L1 Biding.
- L2 Price, Brand Quoted by L2 and L2 Name deals with the pricing, brand assigned to BID and finally, the name of L2 person or entity who is handling the details related details for L2 Biding.
- BID Installation fields will allow the user to set the conditions or status of the BID.
- Inspection fields will allow the user to set the status of inspection if required.
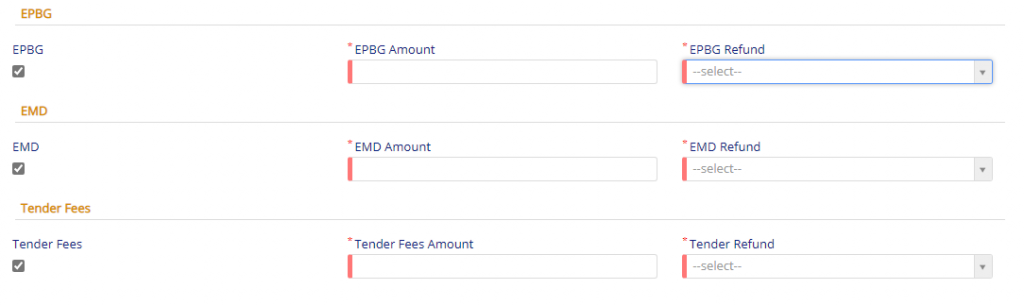
The final section, deals with the EPBG, EMD and Tender Fees which is in continuation with BID Management.
- Export Performance Bank Guarantee (EPBG) field will allow the user to specify related amount and refund status.
- Ernest Money Deposit (EMD) field will allow the user to specify related amount and refund status.
- Tender Fees as the same is quite self explanatory and deals with fields where the user can specify the amount and refund status field.
Recurring Order
Recurring Order tab will allow you the user to set the records as recurring based on the frequency specified.
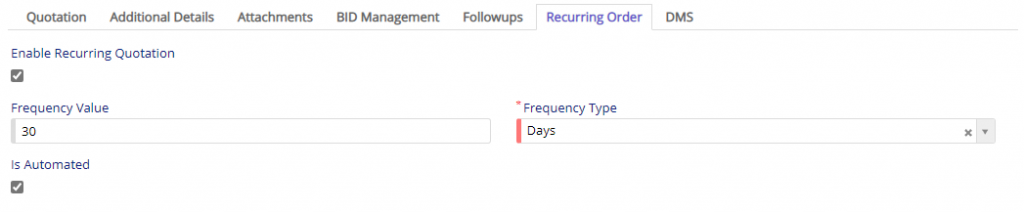
Recurring order tab is visible when required settings are enabled.
- Enable Recurring switch will allow the user to enable the recurring mode for current records which is in process.
- Frequency Value will allow the user to specify the duration after which the records is to be re-created.
- Frequency Type is allow the user to specify the type for the value specified.
- Is Automated flag is set by the system to identify the records which is to be automated.
This sums up the Quotation Module. We hope that you have fair bit of knowledge on how to use and handle the Quotation Module. It is rightly said that, Practice makes man perfect which fits here correctly. As you keep on using this Module you will get used to it. If you find something is difficult to understand you can always connect with the Support team for help.