Cashbook module allow the user to enter the details of payments received and payments done against the invoices. Additionally, one can record all the expenses done over the period of financial year.
Modules mapped to Cashbook module

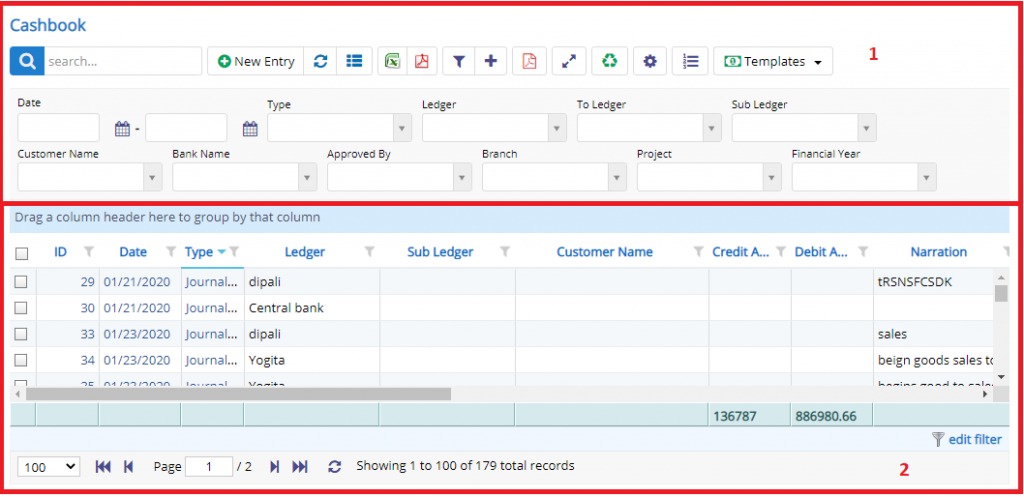
- Annotation – 1 shows few elements like Search, New Entry, Refresh and Column Selector (will describe later in the chapter).
- Search Text box is used to search a specify or similar users form the list below. When you start entering characters it will start searching within the Cashbook Module.
- Refresh Button is used to reload the Cashbook Grid or Table so that the changes which are made to any user will be reflected on the grid.
- The Excel and PDF two buttons are for downloading the Cashbook Grid as Excel or a PDF. These files will contain all the columns are which are visible Cashbook Grid.
- Filters with drop-down feature for the fields like Customer Name are few to name. On the other hand, fields which deals with Dates are given two fields as a part of Date range selection. You can use these filters in combination to filter the records. You will need to click the Filter button to reveal the same.
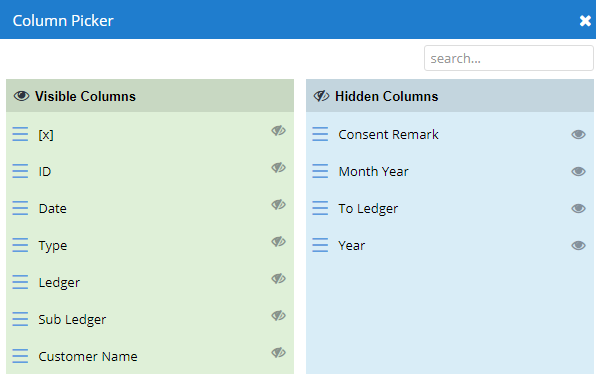
- Column Selector is used to select one or multiple columns from the range of columns. Following is the image for the Column selector. Note – The columns shown in the filter will keep on changing as and when Nafhaa Platform makes changes to the module.
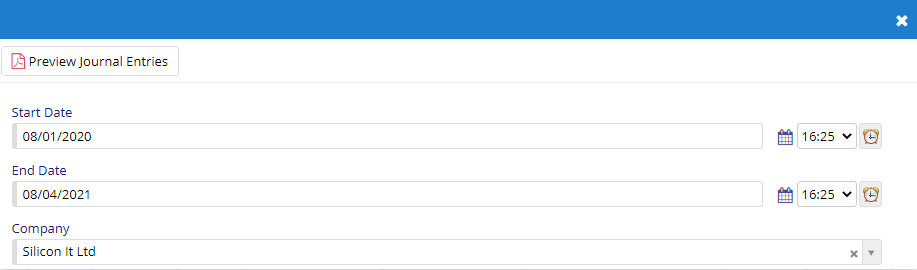
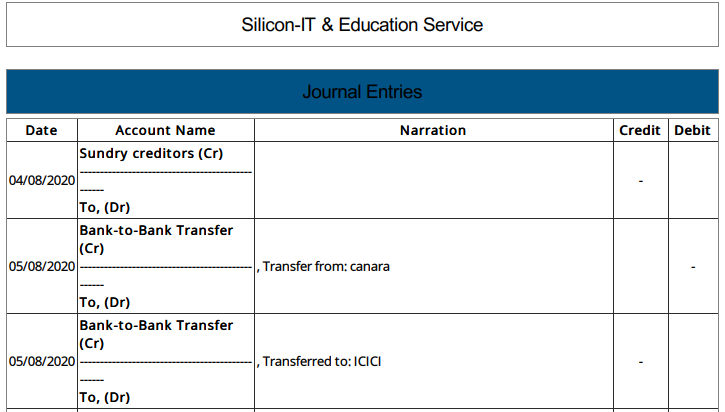
- Preview Journal Entries button will allow users to view the generalized entries of transactions that done. A sample report will look something as shown below but before that, you will need to set some critertia.
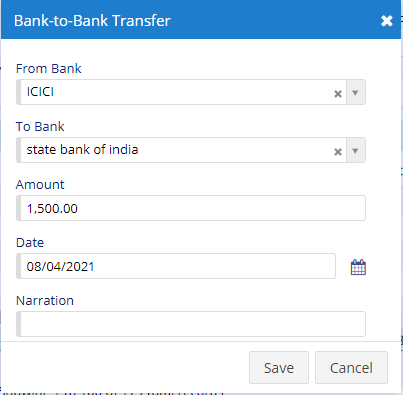
- Bank-to-Bank Transfer button will allow user to quickly add an entry regarding the transfer done without going to main cashbook page.
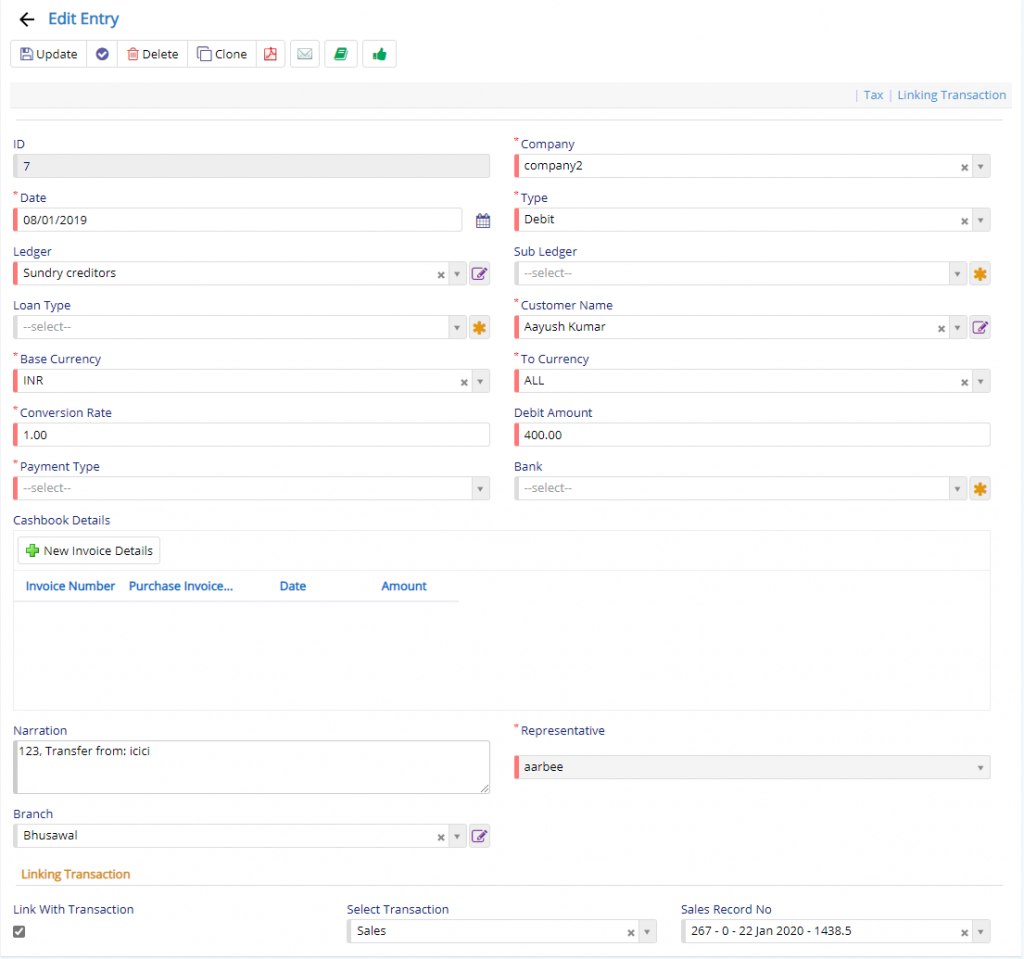
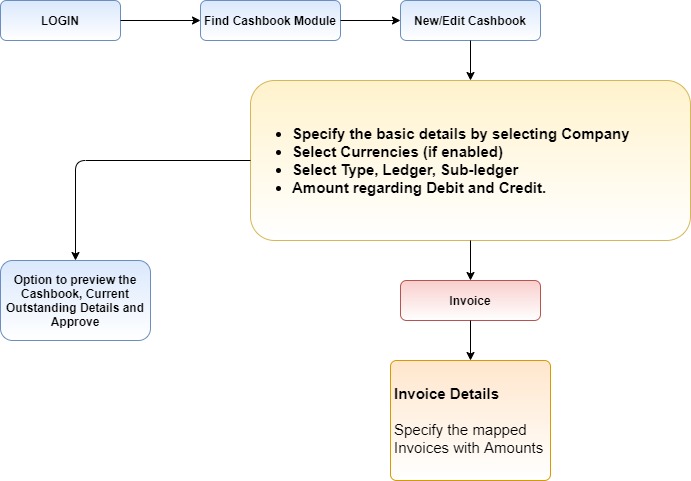
- Company – This field will be visible only when user has enabled Multi-company in Cashbook module. If it is disabled then, by default primary company will be selected.
- Type field will allow user to specify the entry type which could be Debit, Credit or Journal Entry.
- Ledger and Sub-Ledger fields will be solely depend on Type field which will populate only those Ledgers which fall under the selected Type. Same logic will be applied to Sub-ledger, based on ledger selection, sub-ledgers will be populated.
- Currency fields will be visible when Currency Conversion setting is enabled in Company Details.
- Amount field is where the user will enter the amount that is being paid or received from or to the customer against the listed invoices.
- At the bottom, you will have an option to map the records with any of the transactional records.
- Invoice Details section will allow the user to select those invoice/purchase invoice based on the customer selected. Only those records will be populated in Invoice drop-down.
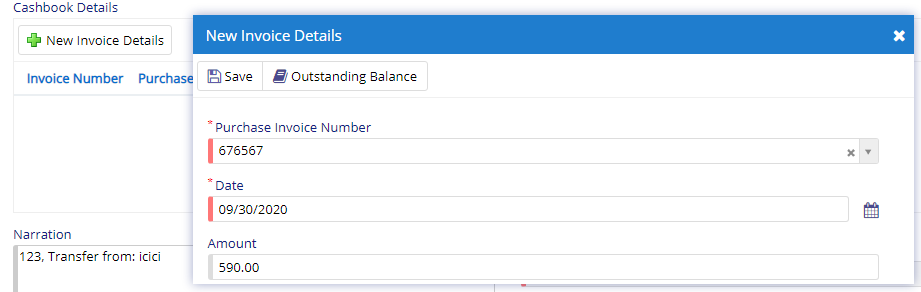
Automatically, remaining amount will be populated.

- Starting from the left is the Update button which is used to update the changes that you have performed in any of the Tab. This button will change to Save when you are creating a new Entry.
- The Next button which is similar to Update button but the only difference is that, it performs the Update operation and remains on the same page. But the later Updates or Save and returns to the Grid displaying List. This button will change its meaning when you are creating a new entry. It will be called as Apply changes.
- The Next button is for Delete, this will delete the selected record from the database.
- The Clone button, will be visible based on permission, it create a clone of currently active record.
- Preview button will allow the user to generate the print for current entry and also you have an option to mail it directly to required stakeholder.
- Approve button will be visible when the permission is granted. User can approve he cashbook entry after validation.
Generalized flow
[Note: Validation for amount values will be checked only if company is Non-Taxable.]