Roles or User Roles are very synonymous in naming conventions. Roles are type of container where multiple permissions are collected to together and then later applied to the user. So, you don’t have to apply permission one-by-one to all the users.
User Roles, is another important aspect in User Management which is the most critical of all as it will affect the visibility of data and modules across Nafhaa Platform.
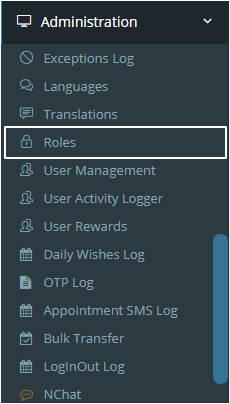
You can open the Roles window by navigating to Administration –> Roles. The option which we are talking here is marked in the image. The other options which you see will vary based on the permissions grouped under Roles and rest all will be hidden. Moreover, all options or menu items are permission based and will be visible to only those users who are assigned to Role with relative permission. A point worth noting here is “admin” can view all the Menu items be it a Main menu or sub-menu.
Having, said that now let us look into the Roles window or page which will show all the details. Following is the page for Roles.
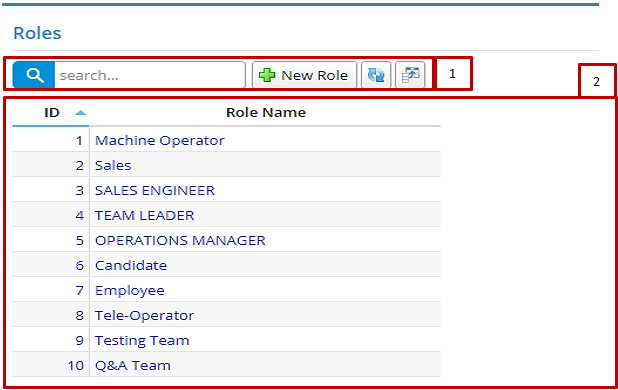
Annotation – 1 shows few elements like Search, New Role, Refresh and Column Selector (will describe later in the chapter).
Search Text box is used to search a specify or similar users form the list below. When you start entering characters it will start searching within the User Roles Module.
Refresh Button is used to reload the User Roles Grid or Table so that the changes which are made to any user will be reflected on the grid.
Column Selector is used to select one or multiple columns from the range of columns. Following is the image for the Column selector. Note – The columns shown in the filter will keep on changing as and when Nafhaa Platform makes changes to the module.
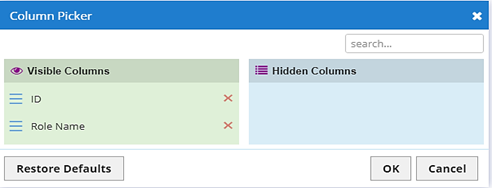
This window will be shown when you click Column Selector button. Here you will be able select which column you want to see on the grid. To view a column in Grid just click the Eye button and click OK. Similarly, if you want to remove a column just click X button and click OK and it will be removed from the Grid.
Now, when you click the New Role button it will invoke the following window where you can create a new role and later assign permissions to that role.
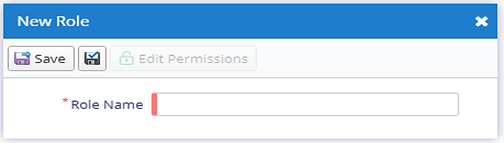
Here you can define the name of the Role. But, have you observed that we have kept the Edit Permission button disabled!! Yes, it is done intentionally because the role is not yet created. You have to save it and Edit the same role again to add the permission like the image below.
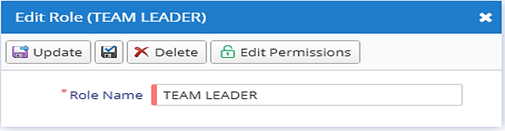
As you can see now, the Edit Permission button has been enabled because you have saved the role and now you are adding permissions to that role. Rest all the three buttons perform the same action as we have discussed in pervious chapters. But we will focus on the Edit Permission button here and when you click the button you will get the following window which contains the list of permissions.
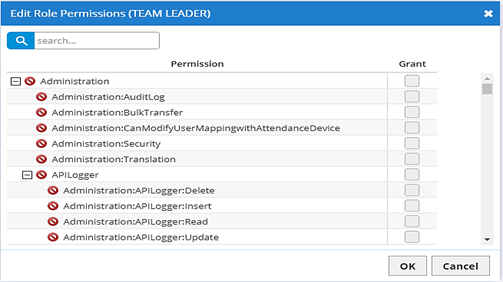
This window is very much similar to the window which you come across in the User Management Module. The only thing has changed in the context or the module. Earlier it was Edit Permissions for Users and in this context, it is for User Roles aka Roles.
Now, that you have created a Role and have assigned Permissions to the Role so let’s assign it to a user. We will go back to User Management module and edit a non-admin user and click on Edit Roles buttons.
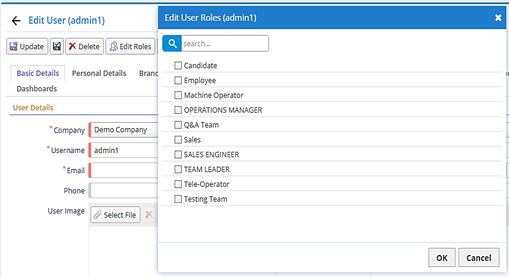
As you can see above, we have edited a non-admin user and we have invoked Roles dialog. Here, we can see all the Roles that have been created by an admin user or a user who has a permission to define Roles and assign permission to them. He we can assign multiple Roles to the user. But now if a situation arises, what if you want to Revoke a permission but keeping the Role intact then you can open the Edit Permissions dialog and search the specific Permission and check the Revoke column to remove the permission for a specific user.
Later on, if you want to add permission to any of the roles perform the same steps as defined above by editing the role and assigning the required permissions.
Annotation – 2 shows the list of all the Roles that have been created where the user can click record to open it and edit it if needed.
Well this sum up the User Roles and here we have understood the procedure of Creating, Updating the User Roles.