Purchasing is the process a business or organization uses to acquire goods or services to accomplish its goals. Although there are several organizations that attempt to set standards in the purchasing process, processes can vary greatly between organizations.
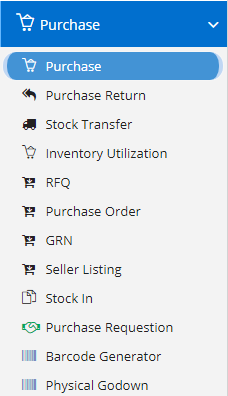
Purchase is a part of Purchase module which is used to record the purchases you have done within your organization. Purchase affect your inventory to a great extent.
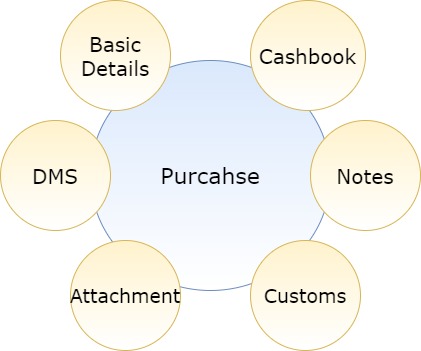
Modules included in this module. We haven’t shown Product as it is a default sub-section without which Purchase is incomplete.
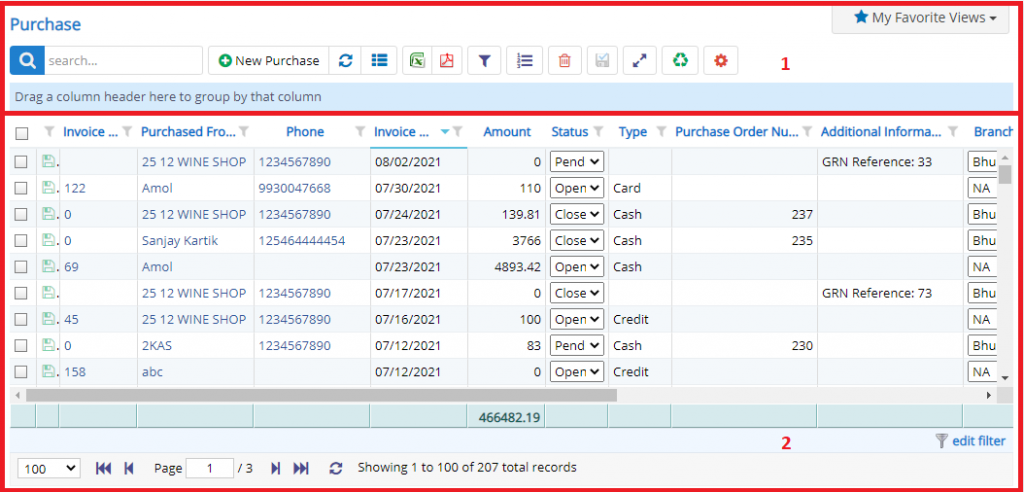
- Annotation – 1 shows few elements like Search, New Purchase, Refresh and Column Selector (will describe later in the chapter).
- Search Text box is used to search a specify or similar users form the list below. When you start entering characters it will start searching within the Purchase Module.
- Refresh Button is used to reload the Purchase Grid or Table so that the changes which are made to any user will be reflected on the grid.
- The Excel and PDF two buttons are for downloading the Purchase Grid as Excel or a PDF. These files will contain all the columns are which are visible Purchase Grid.
- Filters with drop-down feature for the fields like Product are few to name. On the other hand, fields which deals with Dates are given two fields as a part of Date range selection. You can use these filters in combination to filter the records. You will need to click the Filter button to reveal the same.
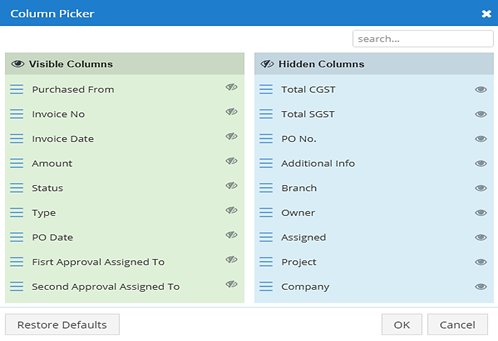
- Column Selector is used to select one or multiple columns from the range of columns. Following is the image for the Column selector. Note – The columns shown in the filter will keep on changing as and when Nafhaa Platform makes changes to the module.
- Annotation – 2 shows the list of all the Purchase records that have been created where the user can click record to open it and edit it if needed.
This was all about the Purchase Grids introduction now let’s get inside the module.
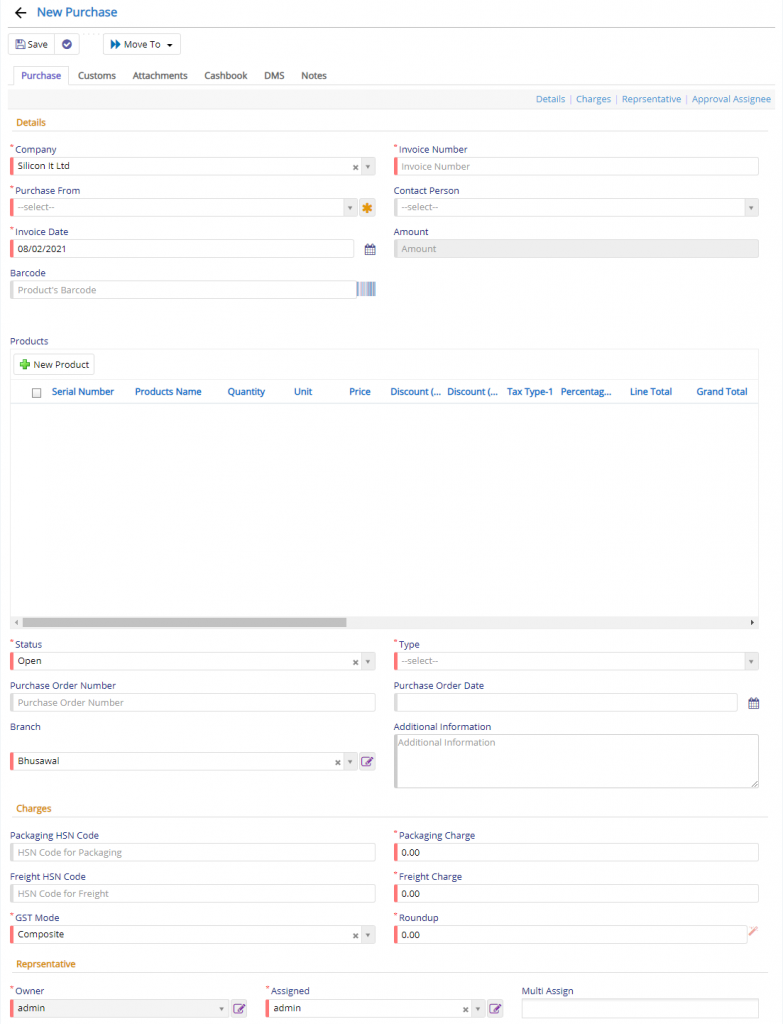
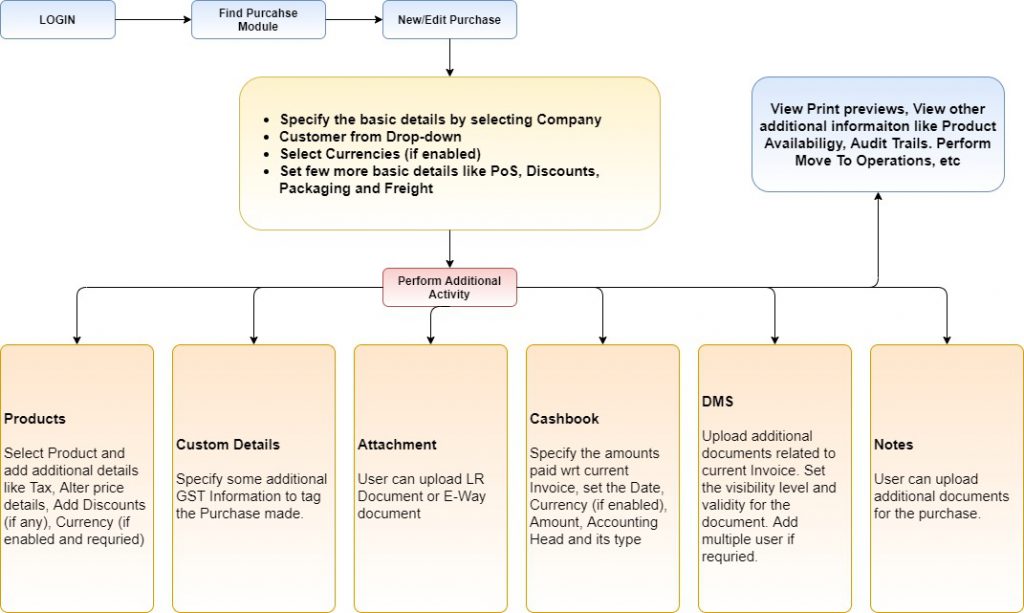
The purchase tab deals with the Basic information which is essential to identify a purchase. Here you need to set –
- Invoice Number which you get on the Bill/Receipt along with the goods received.
- Purchase From is a field where you will need to select the person’s name from where the goods are purchased.
- Invoice Date field will allow you to set the Invoice Date for the current purchase of product. Mark this date very carefully as the same will reflect in GST Reporting if you have opted for and based on GST Type you belong to.
- Packaging and Freight HSN Code and Charges can be specified in their respective fields if you have incurred some.
- Roundup field is used to round up the value to nearest full number i.e. 25.75 will be 26.00.
- GST Mode field will decide how the GST has been applied for the current purchase. Default is Composite.
- The last two field denote the Owner of the Purchase records and Assigned field which defines to which user this Purchase records was assigned to handle.
- Product field is where you select the products which you have purchased. You can add the product by entering the Product barcode in Barcode which will identify the product and add it to the grid below. On clicking, the New Product button you get the following details.
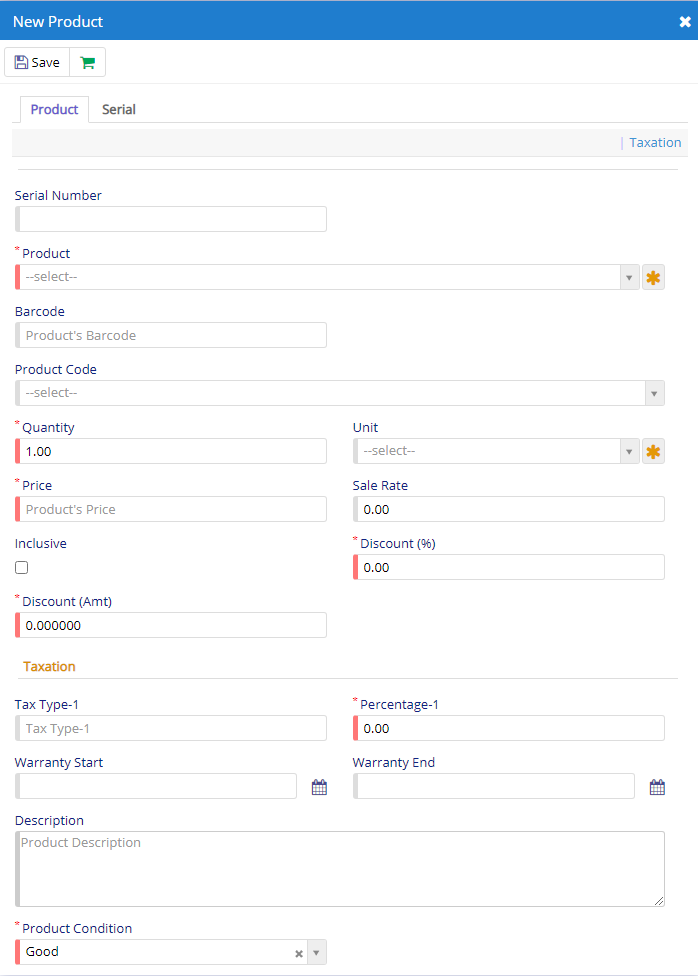
- Here, you need to select the Product and rest all the fields will be populated based on the values available in the Product Master. Please Note – some fields will invisible based on the settings enabled in the Company Details Page. Hence, the dialog will look smaller with less fields. The fields which are marked in * are mandatory and needs to specified prior saving the Purchase details. Such fields are like Rack and Product Grade – These two fields will be visible only if the settings are enabled. This will allow you to categorize the Products based on Racks.
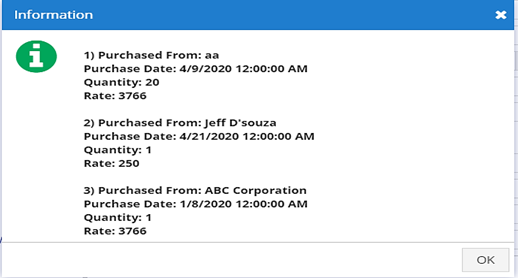
- Finally, at the top of the dialog you have Purchase History button which will show you the history for the selected product.
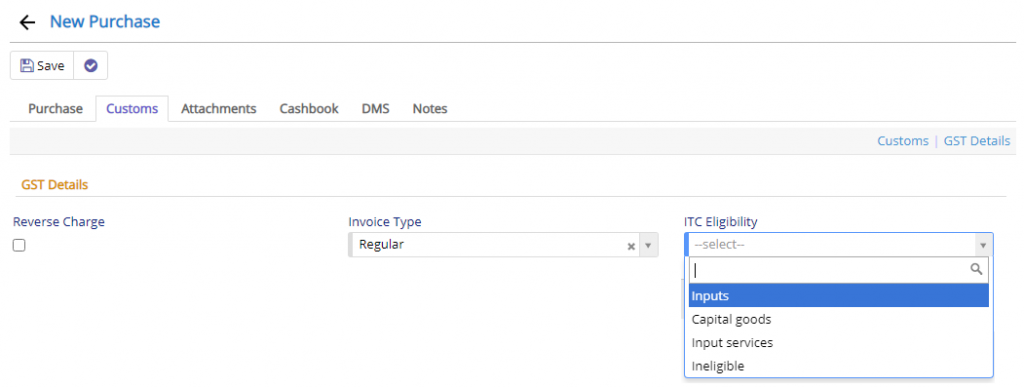
This tab is used to specify the Custom details if you purchase items which have been Imported from other country other than home country. Reverse Charge field will be applicable if you have purchased from an Un-registered vendor. ITC Eligibility will allow you to set the condition for GST Tax.
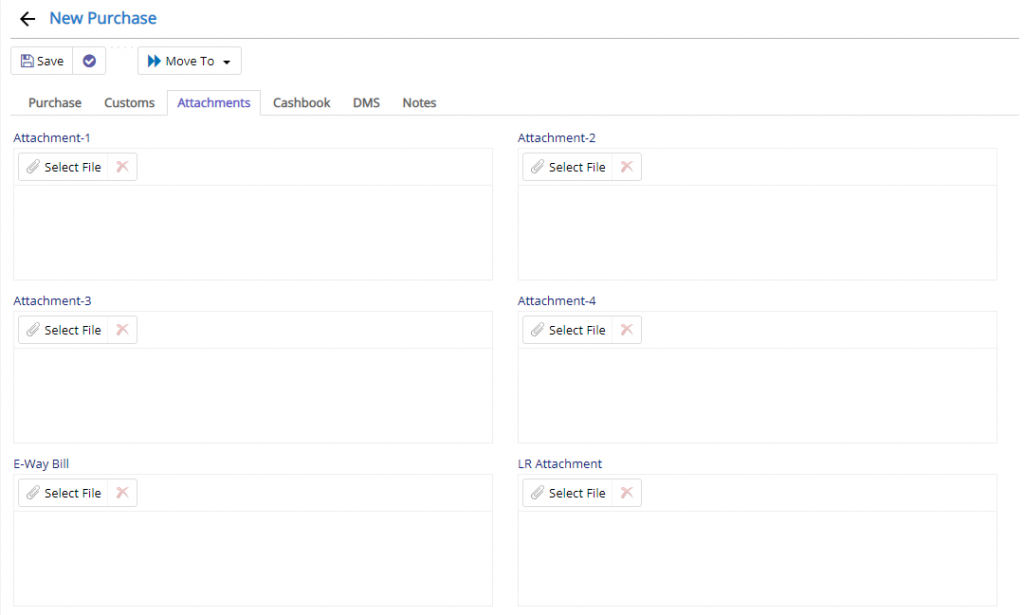
Here, you have an option to upload Purchase details as a part of additional records. You can also upload E-Way Bill details generated via E-Way portal and LR Attachment fields.
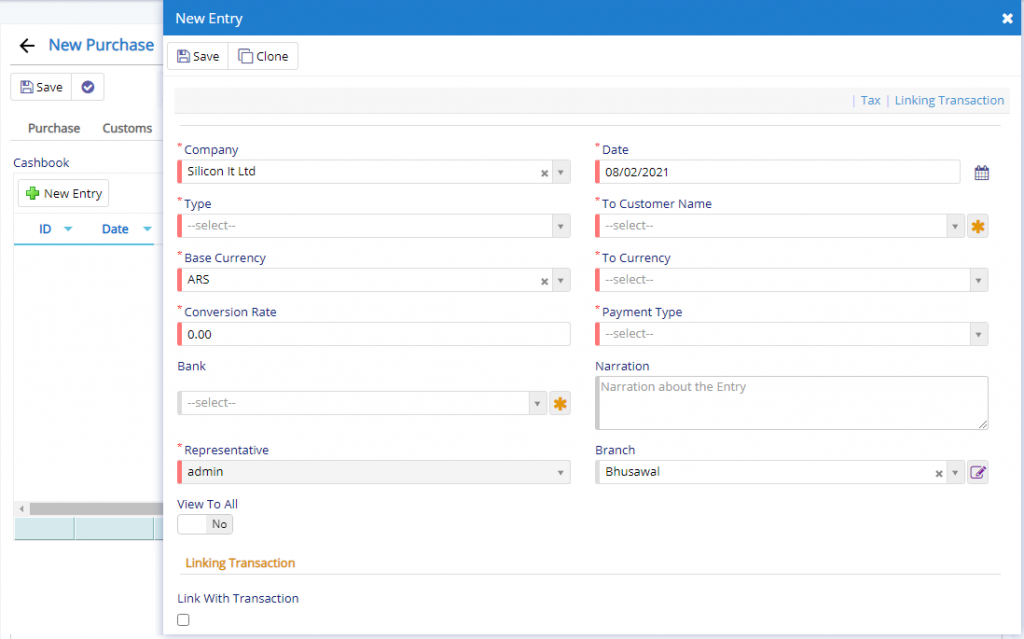
Next the Cashbook tab using which you add and entry to Cashbook regarding the Payment made to the customer against the Purchase and the same can be done by enabling the switch as Link with Transaction. Cashbook dialog or window is very much the same as we have seen in actual Cashbook module.
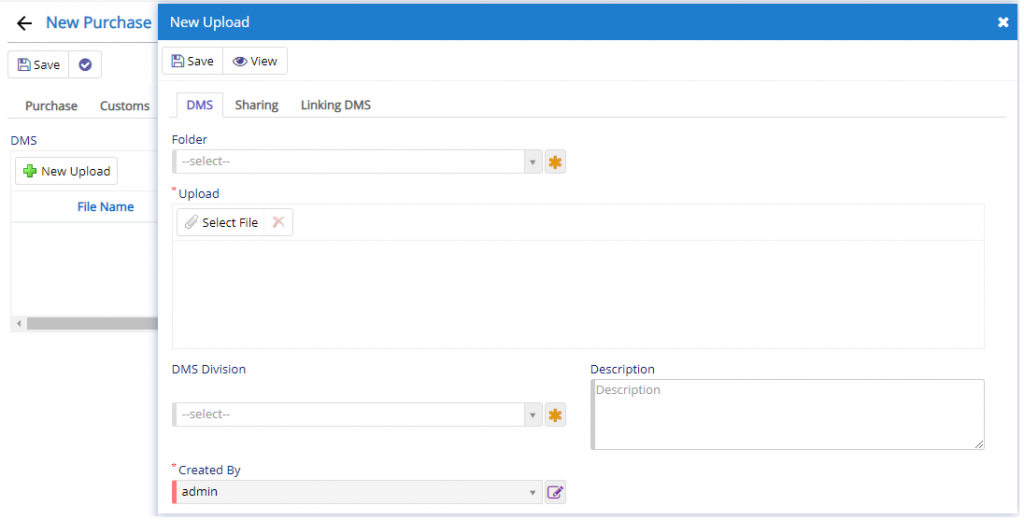
This section is visible under DMS Tab in Purchase. To view and use the same you will need to enable in from Company Details under Settings tab.
This section will allow the user additional documents if needed and they have exhausted the attachment fields that are provided. This will link the upload data with the Purchase entry.
Finally, Notes section is used to add additional information regarding the Purchase that is done.

- Starting from the left is the Update button which is used to Save the changes that you have performed. This button will change to Save when you are Creating an Entry.
- The Next button which is similar to Update button but the only difference is that, it performs the Update operation and remains on the same page. But the later Updates and returns to the Grid displaying List of Purchases. It will be called as Apply changes.
- The Next button is for Delete, this will delete the selected record from the database.
- Preview button is used to render a PDF view for the currently opened Purchase. This button will be visible in Edit Mode only.
- Print button will allow you to print the Barcode for the products. Make sure, you have enabled and updated the required Barcode settings.
Show Audit Trails button will show the changes made to the Purchase in its lifetime.
- Import Products will allow the user to upload the products in one-go. You can use this feature, if you have, more than 10 items in a single purchase. Make sure, you create any empty purchase without any products and then re-open the newly created record and then upload. This will provide the user with a uploader.
- Payment button will invoke a new window of cashbook to record the payment.

- Purchase Return – Purchase will be moved to Purchase Return module for further processing of returning the items.
Generalized flow of Purchase Module