Goods Received Note is the record of goods received by the store manager. After receiving the goods, inventory ledger is updated mentioning the GRN number along with the date. This document is used to confirm whether all goods mentioned in the purchase order (PO) have been received.
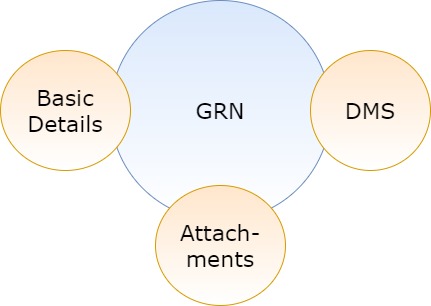
Modules included in this module. We haven’t shown Product as it is a default sub-section without which GRN is incomplete
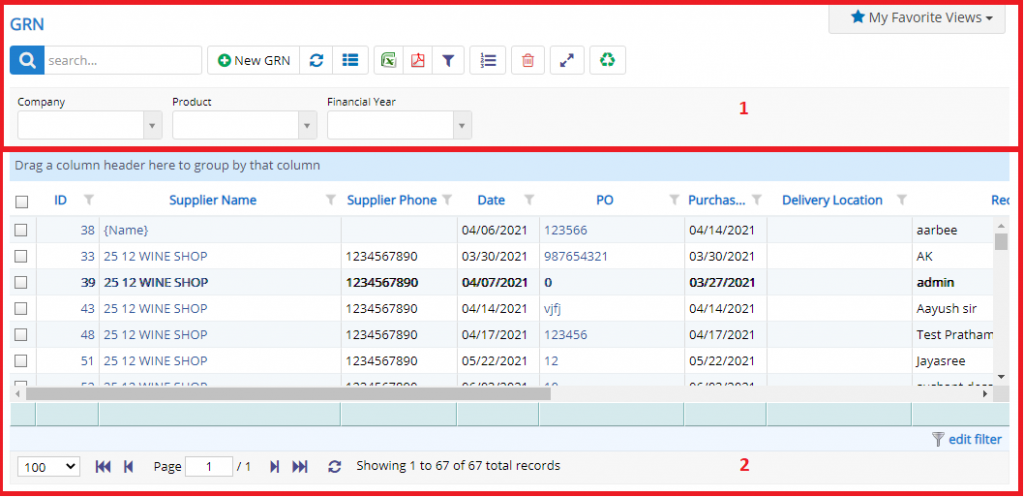
- Annotation – 1 shows few elements like Search, New GRN, Refresh and Column Selector (will describe later in the chapter).
- Search Text box is used to search a specify or similar users form the list below. When you start entering characters it will start searching within the GRN Module.
- Refresh Button is used to reload GRN Grid or Table so that the changes which are made to any user will be reflected on the grid.
- The Excel and PDF buttons are for downloading the GRN Grid as Excel or a PDF. These files will contain all the columns are which are visible GRN Grid.
- Using these filters, you filter the GRN Records and view only which are required. Filters with drop-down feature for the fields like Project and Product. are few to name.
- Column Selector is used to select one or multiple columns from the range of columns. Following is the image for the Column selector. Note – The columns shown in the filter will keep on changing as and when Nafhaa Platform makes changes to the module.
- Annotation – 2 shows the list of all the GRN records that have been created where the user can click record to open it and edit it if needed.
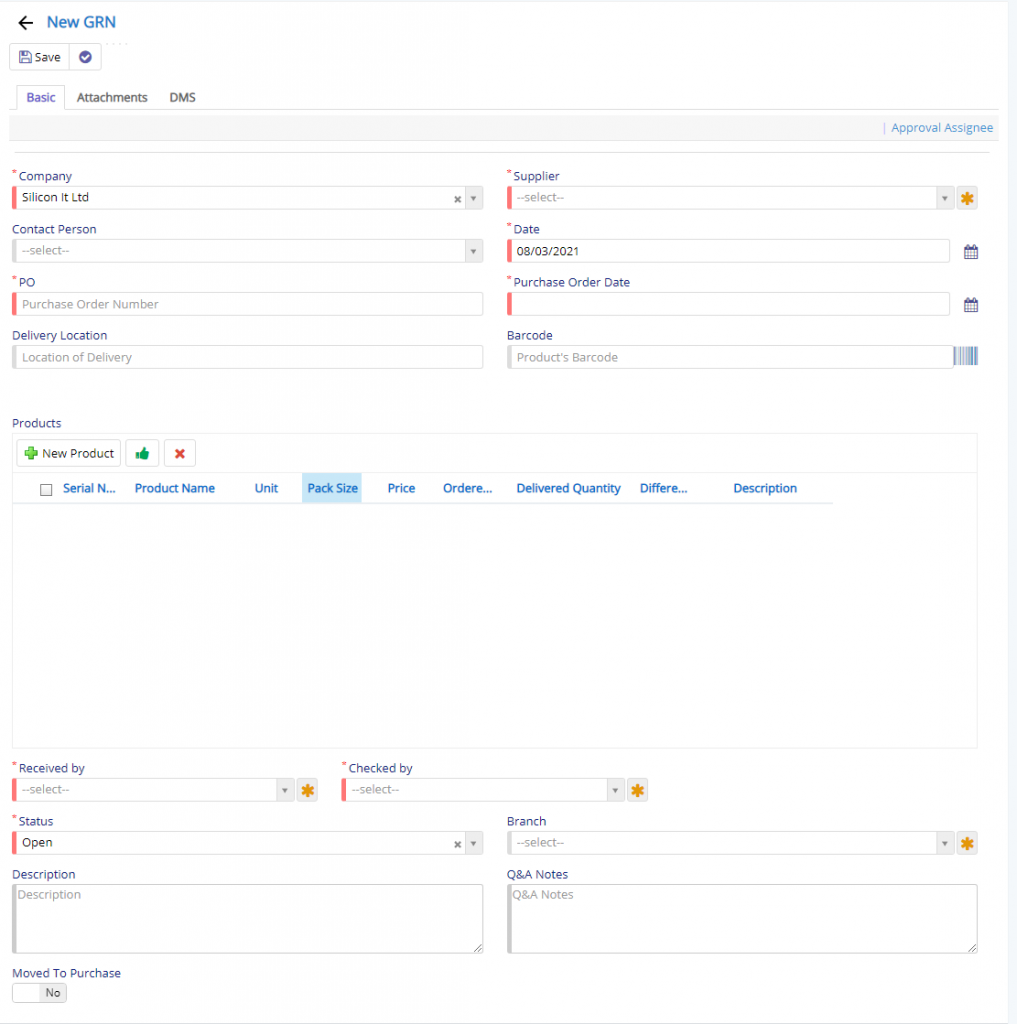
- Project field will be visible only if it is enabled in Company Details Settings/Extra Settings Tab. This will help you to map the GRN Entry to a Project if it is meant for a Project. If you are not using Project Management you can disable it. By default, Project Management is set to Disabled (False).
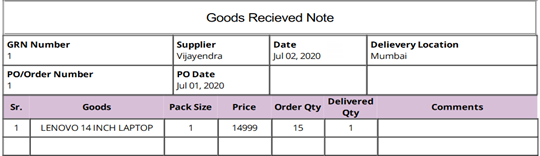
- Supplier field will allow you to specify the Vendors/Suppliers Name from which the Products have been procured.
- Contact Person will allow you to select the Person from Supplier’s place who is looking after the Dispatching department so that you will be able to communicate and understand who is handing the department. This is optional field and you are not required to specify one.
- Date field is used to select and set the date for the GRN Entry.
- PO and PO Date field is used to specify the PO number and PO Date generated during the procurement process. This will allow you to map the PO with GRN.
- Delivery Location will help you to specify the Delivery Location for the Products.
- Custom Number will allow you to specify the Custom Numbering for the GRN. Custom number is fully dependent on Financial Year, so make sure you set the Financial Year Start Month correctly in the Company Details Page. A change in date across different financial year will change the Custom Numbering sequence.
- Received By field will allow you to set the user’s name who has received the consignment/lot of products.
- Checked field will allow you to se the user’s name who has Checked the received the consignment/lot.
- Products section will allow you to add multiple products to GRN Entry.
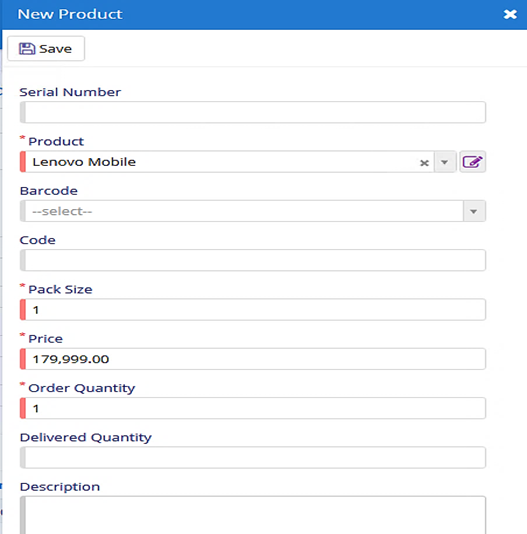
- Serial Number field will be visible only if it enabled in Company Details Page.
- Product field will allow you to select the Product for the which the GRN is prepared.
- Select Barcode for the Product if it has any.
- Pack, Price and Order Quantity are compulsory fields which will allow you to specify the Pack size, Price of the Product if it is different from the value specified in Product Master and Number of Products Ordered.
- Delivered Quantity will allow you to specify the count which has been received in the current lot of arrivals.
- Description is where you can add little information related to the product.
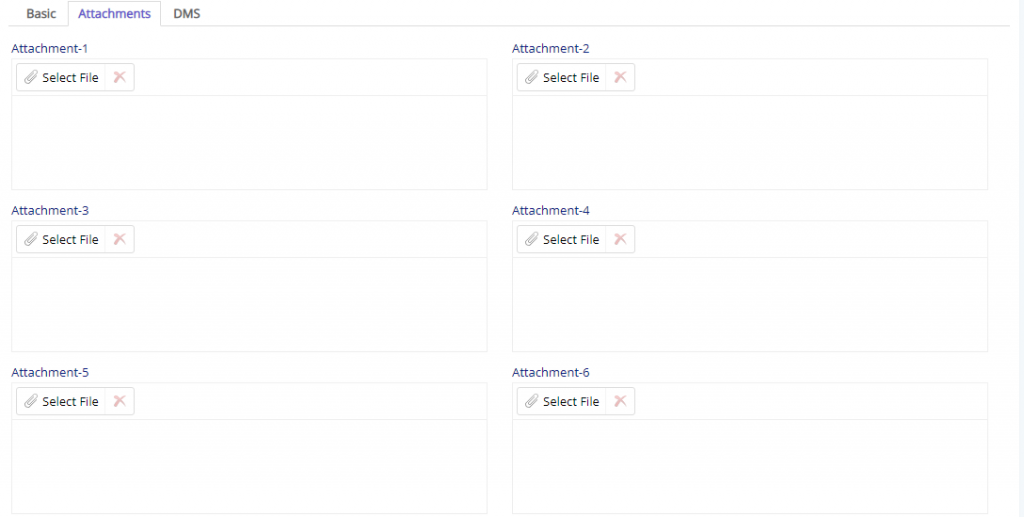
This tab totally deals with the Attachments that may be required to store for the GRNs. It could be any document like Challan, Receipt, etc are few to name that may be associated with the GRN. You have total six attachment field to store documents.
DMS Tab will allow the user to add documents related to the GRN.
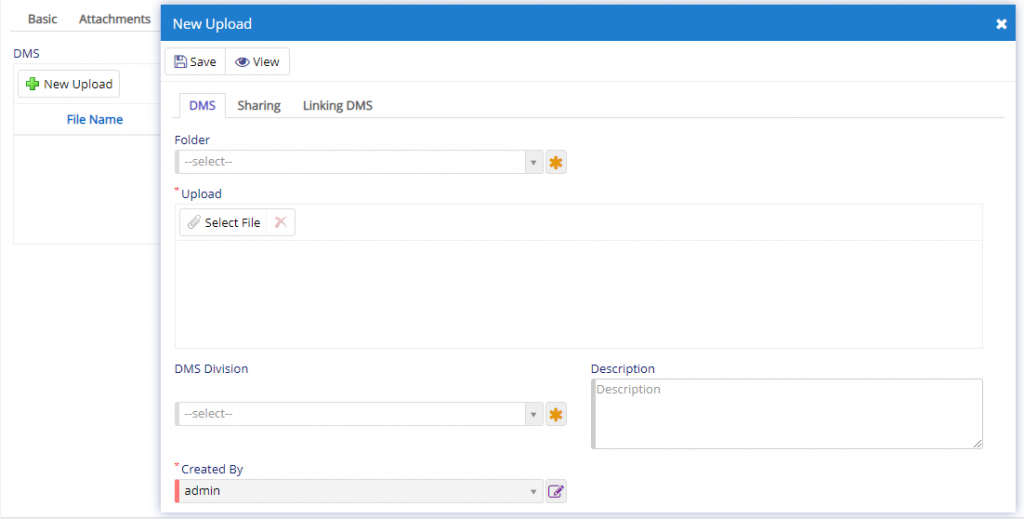
Here, can upload the file, assign Folder level under which it should be uploaded. If more bifurcation is needed, then, one can use DMS Division field. Description field can be used to describe the file in more informative way.
Under DMS, Sharing Tab will be used to share the document to the pears or users with validity specified.
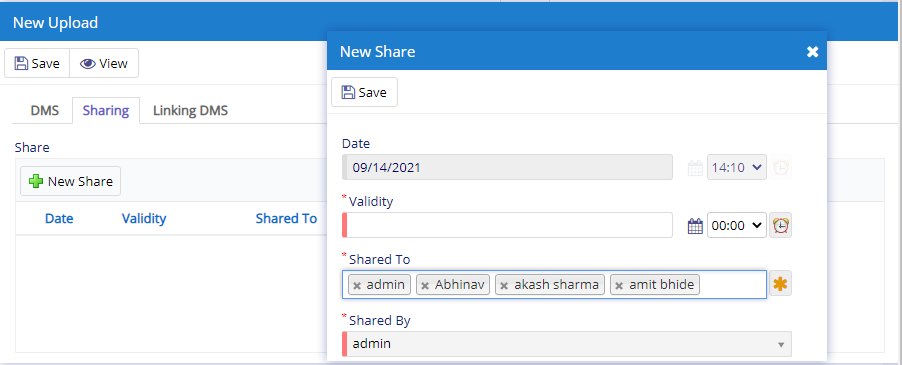
As shown here, the user can select multiple users with whom the file is to be shared. Validity field will put restriction on visibility of the file until the specified date has been elapsed.
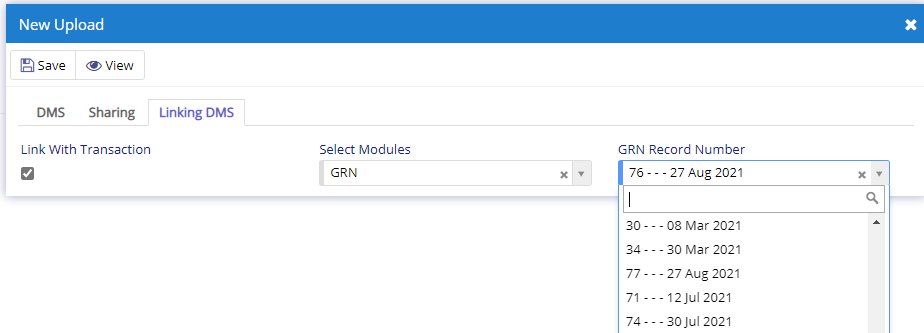
Under DMS, Linking Tab can be used to link the DMS to current record.

- Starting from the left is the Update button which is used to Save the changes that you have performed. This button will change to Save when you are Creating an Entry.
- The Next button which is similar to Update button but the only difference is that, it performs the Update operation and remains on the same page. But the later Updates and returns to the Grid displaying List of GRN. It will be called as Apply changes.
- The Next button is for Delete, this will delete the selected record from the database.
- Clone button will clone the open record which is opened currently. This will save you data-entry work and hence you can proceed to create an entry by modifying the required values.
- Print Button will print the existing GRN record in PDF Format which can downloaded or printed using a Printer.
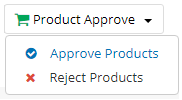
- Approve Products – This will approve all the products added in GRN.
- Reject Products – This will reject all the products added in GRN.
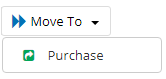
- Purchase – GRN will be moved to Purchase module for further processing of purchasing the items.
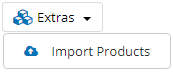
- Import Products –This will invoke a window where the user can upload the Excel file containing the products.
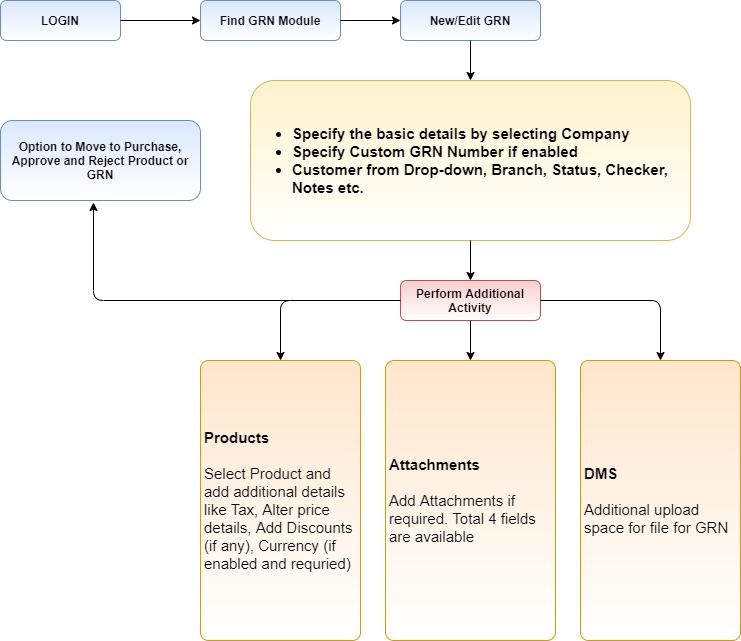
Generalized flow of GRN Module