This will help you to configure your Contact Settings. Following are some the important settings which you will need to configure for seamless experience while using portal.
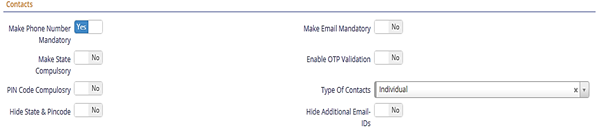
- Make Phone Number Mandatory – This will make Phone number compulsory in Contacts Module.
- Make Email Mandatory – This will make Email compulsory in Contact Module.
- Make State Compulsory – This will make Contact’s State compulsory.
- Enable OTP Validation – This will validate the contact number before saving the details.
- PIN Code Compulsory – This will make PIN code for the contact compulsory.
- Type of Contact – Default type of contact will be set in Contact when try to create new contact, you don’t have to select the same again there.
- Hide State & Pin code – This will hide the State and Pin code fields from Contact page.
- Hide Additional Email IDs – This will hide the other email id fields which are not mandatory, retaining the primary email-id field.
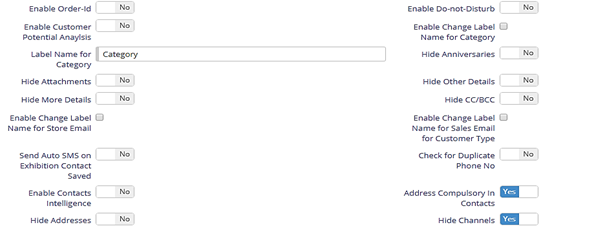
- Enable Order-Id – This will enable an Order-Id field which will be used to map the orders received for this contact.
- Enable DND – This will enable a switch in Contacts module where you can set the user as DND if don’t wish to receive promotional SMSs, etc. Enabling this will skip the contact while sending Bulk Emails.
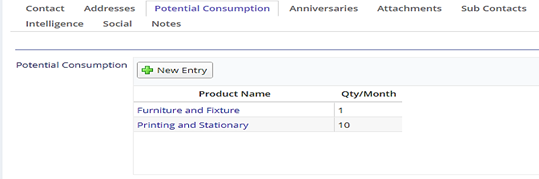
- Enable Customer Potential Analysis – This will enable a sub-module within contact module where you can set the Quantity of the products required by the selected contact. With this you can be prepared for future orders and be ready with the stock for the added products. You will have a new tab when you enable this setting as shown below.
- Enable Change Label Name for Category – On checking this, you will have the specify the replacement name in field named Label Name for Category. This will change the display name in Contacts page for your better understanding.
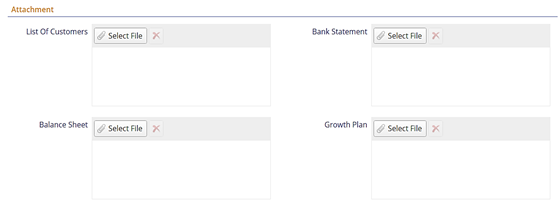
- Hide Attachments, Anniversaries, More Details, CC/BCC – We have clubbed together few settings. When you check Hide Attachment then Attachment tab will be hidden, this can be if do not intend to use attachments. Hide Anniversaries will Anniversaries tab which contains details for your contacts. Hide More Details will hide the More Details tab from contacts which contains details like Grade, Area, Customer Type, Bank Details, etc. are few to name. Hide CC/BCC will hide the CC/BCC tab from contacts which is used to send the Emails to CC/BCC which are defined. If you want to use or stop using it you have to just check/uncheck the controls respectively in Company Details settings page as shown in Figure – 12.
- Enable Change Label Name for Store Email & Enable Change Label Name for Sales Email for Customer Type – This will enable a textbox field to specify the name that is to be replaced in Contacts module respectively. Once you define the name the same will be reflected in contacts module.

- Send Auto SMS on Exhibition Contact Saved – Enabling this will shoot a SMS to the registered contacts via Exhibition dialog.
- Check for Duplicate Phone No – This will check for duplicate phone number usage while saving the contact. If a duplicate phone is found platform will show you an error.
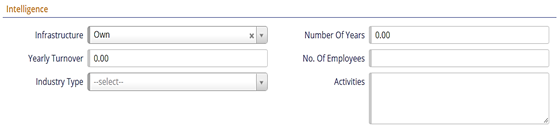
- Enable Contacts Intelligence – This will enable a new tab named Intelligence where you can set the contacts details such as Yearly turnover, Infrastructure type, No. of Employees, Industry Type, etc. are few to name. Following is the image for the same tab.
- Hide Address & Hide Channels – These two checkboxes will hide/unhide their respective tabs named Address and Channel.
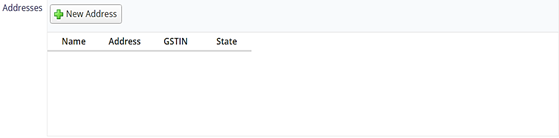
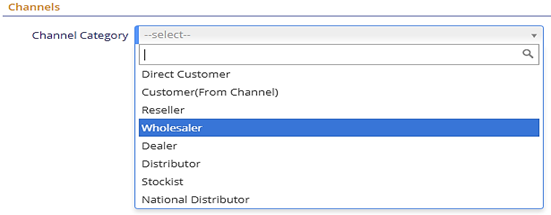
These fields will be hidden if you uncheck the settings respectively. Each of them is independent controls in settings page and in no way, they are dependent on each other.
- Hide Category & Hide Country – This will hide the Category and Country drop down from contact’s page. If you don’t wish to set the category of a contact you easily turn on this setting. On the similar lines you perform the same action for Country and Country drop-down will be hidden.
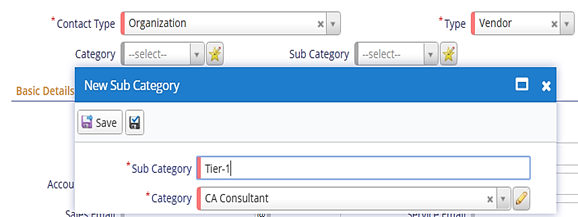
- Enable Sub-Category in Contacts – This will enable sub-category drop-down list in contact if you wish to filter the contacts base on this field. If you have permission to add a sub-category on the fly then you see a Star button to right side of the drop-down called as in-place add. Using this you fill the Master details for Sub-Category which is of type Save-once-use-many times. Following the image for the Sub-category drop-down and Sub-category Master module to add the details on the fly.
- Hide Amazon Import Buttons and Hide Tally Import Buttons – This will hide/unhide Amazon related and Tally related buttons respectively. On top of that these buttons are secured under permissions. If these buttons are made visible and if you don’t have the permission then these buttons will be hidden for a specific user and for those who has permission then these buttons will be visible.


- Enable Touchbase in Contact – This will enable Touchbase in contact which will enable to schedule your follow-up with the contact. You can define up-to six different type of Touchbase type.
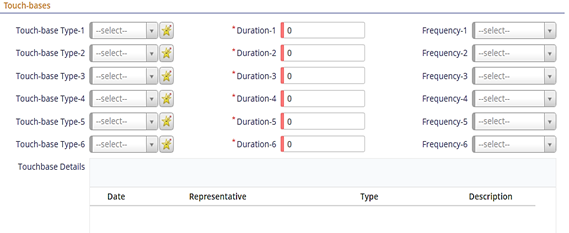
Each Touchbase has an option to create new type of Touchbase on the fly called as in-place add. Here you can set duration and frequency of any type Days or Months.
- Enable Direct Calling from Contacts Using IPBX – This enable the user to directly call using an IPBX device connected. A phone like icon will be shown in the contact grid.
- Enable Print Name in Contacts – This will enable a field in contact where you can specify an alias name for the contact by which you identify one across your business.

- Enable Special Alert in Contacts – This will enable a field in contacts where you can specify a special note for the selected contact which can be view on service dashboard.
- Enable 1-Stage Approval & 2-Stage Approval – This will enable Approval fields in contact to approve the contact. If you have enabled 1-Stage then you will have a single drop-down to assign for approval and if you have enabled 2-Stage then you will have a two drop-down to assign for approval. This will make sure the contact details are verified by one or two people respectively. Respective users will see either of two buttons for the approval of the contact.


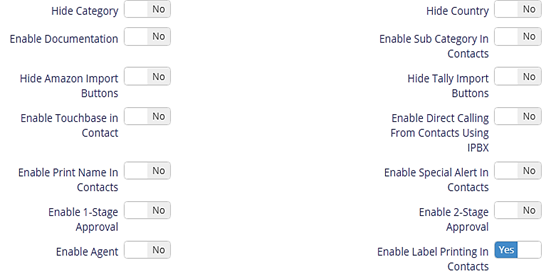
- Enable Label Printing in Contacts – This will enable a button on Contact grid to print a label. Please refer Annotation – 1 for reference and module display.
- Enable Agent – This will enable a new drop-down in Contact which will help the user to select a contact which acts as an agent for a contact. There is an in-place add to add an agent and it will invoke new Contact window.
