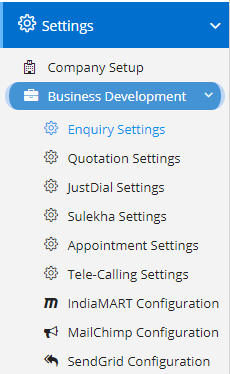
Enquiry Settings can be accessed by going into Settings menu as shown in the side image.
- Make Follow-up Mandatory – This will prompt the user the add at-least one follow-up before saving the Enquiry if the user fails to do so any error will be shown stating to add a follow-up. Default is False.
- Make Product Mandatory – This will compel the user to add at-least one product to list before saving the Enquiry. Default is False.
- Enable Auto Email in Enquiry – Enabling this setting the Enquiry Module will send an email to the customer using the customer’s email address if present. While sending the mail Enquiry Module will use the template content set by the organization. Make sure your SMTP settings are configured correctly in the Template or at the user level.
- Enable Auto SMS in Enquiry – Enabling this setting the Enquiry module will send a SMS to customer using the customer’s phone if present. SMS Gateway configuration will be used to send the SMS. Make sure your SMS Gateway settings are configured correctly.
- Enable OTP – This will enable OTP validation before saving the Enquiry. This is to prevent Spam Enquiries.
- Enable Time Escalation – This is used to escalate the Enquiry if not attended by assigned personnel. The time to escalate an enquiry should be specified in the field Minutes after an Enquiry should be escalated.
- Check for Duplicate Records – Enabling this will put a check in the Module to avoid duplicate enquires for the same contact containing similar data. This will put a break on fake enquires.
- Enable Attachment – This will add new field as attachment in Enquiry and will enable the user to upload an attachment
- Enable Custom Numbering – This will enable a field name Custom Number which will enable the user to specify the custom number for the Enquiry. The custom number will be generated sequentially based on the Financial Year, but as a user if you have permission you can change the same. Then from the next Enquiry onwards, new sequence number will be considered.
- At-least One Open Follow-ups – This can be used in conjunction with the Point – 1. This will ask the user to add one open follow-up.
- Enable Auto Email to Assignee – When a new Enquiry to assigned to a user an email will be sent to the Assigned user notifying him about the new Enquiry.
- Enable Auto Follow-ups – Enabling this will add a new follow-up for the Days specified in the field Auto Follow-up in Days. This feature can be used in conjunction with Point – 1 and 10.
- Hide Pricing Details in Enquiry Product – This will hide the Rate fields from the Enquiry Product submodule. If you don’t want to rate the product in the Enquiry, then you can use this feature to avoid adding the rates. Please note – When we use terms like Enquiry Product or Sales Product make sure you refer to the sub-module in the main module named Enquiry or Sales. This is applicable for all the modules.
- Disable Multiple Moving to Quotation – It may happen that your Enquiry goes into the next stage of providing Quotation then you may move the Enquiry to Quotation using Move to Quotation Button but accidentally you move the same Enquiry to Quotation again which unwanted. By enabling this setting, you can avoid such accidental moves.
- Hide Amount – This will hide the amount field from the Enquiry Module.
- Enable Auto Close of Enquiry – This is a dependent setting as it will ask you after how many days? In the field named Auto Close Enquiry after day(s). You need to specify the number after which Nafhaa Platform will mark the Enquiries as Closed. You can always go back and set the Status to Open if you receive any communication from the customer wrt. Enquiry.
- Enable Taxation in Enquiry – Usually, Enquiries do not require Taxation details and calculation.
- Enable Automatic Enquiry Re-assignment – this is a dependent setting as it will ask you two parameters like – Re-assign Enquiry after minutes and Re-assign to where you will specify the value for minutes and select the User from the drop-down respectively. Nafhaa Platform will then re-assign the Enquiry to the selected personnel.
- Enable Scrutiny of Leads – This will analyse the incoming leads and then automatically respond to the customer based on the condition of the Enquiry.
- Hide RFQ Details in Enquiry – RFQ stands for Request for Quotation. If your organization does not include RFQ step in the workflow then you can easily hide these details.
- Hide Freight and Fin – This will hide the Freight and Fin fields. If you don’t want to specify these details at the Enquiry stage you safely turn this on.
- Hide Quoted Price – This will hide the field where you can specify the price that you Quoted to the customer against this Enquiry. Quoted price will come into picture only if you have moved the Enquiry to the Quotation stage.
- Enable BID Management – This will enable a new sub-module named as BID Management in Enquiry Module.
- Hide Expected Closing Date in Enquiry – This will hide the Expected Closing date field from Enquiry if don’t intend to specify the Expected Closing Date.
- Hide Stage in Enquiry – This will hide the Stage drop-down from the Enquiry. You can use this option if your organization is not using stages in Enquiry.
- Hide Notes in Enquiry – This is field the additional feature called notes where you can add additional information for the current Enquiry. You can use this Notes in addition to Additional Info field in Enquiry.
- Hide Attachment in Enquiry – This will hide the attachment tab from the module. You can use this setting if you don’t want any attachments in Enquiry.
- Hide Show Enquiry history in Enquiry – This will hide the button named Show Enquiry History which shows the history of all Enquiries received by the customer selected in specific Enquiry.
- Hide Move to Sales in Enquiry – This will hide the button for Move to Sales in Enquiry module. If your organization doesn’t support this workflow then, you can safely turn on this feature and can avoid accidental move to Sales module.
- Hide Products – This will hide the sub-module Products form the Enquiry module. You can use this feature if intended to not to specify the product at the initial phase of communication with customer.
- Enable Alert on Closed Enquiry Move – As the settings speaks of the operation that it is going to perform. If you mark an Enquiry as Closed for whatever may be the reason be it success of failure in acquiring the lead and if you try to move the Enquiry some other Modules like Quotation or Sales then this setting will show you can error stating the reason. This will act like a check before moving the entries across modules.
- Enable Sub-Contacts in Enquiry – This will enable Sub-contact in Enquiry for selection as a part of reference.
- Make Win-confidence Mandatory in Enquiry – This will make Win-confidence compulsory in Enquiry and user will have to select at-least one option. By default, Win-confidence is not compulsory.
- Enable SMS/Email Campaign Mapping in Enquiry – This will enable mapping of SMS/Email Campaigns that you run on Nafhaa Portal using any means of marketing like Mailchimp, SendGrid, etc. This will help you to segregate the leads received.
- Enable Auto add Follow-up in Enquiry – Enabling this option will automatically add a follow-up to Enquiry after the number of day(s) specified in Auto add Follow-up for Day(s) in Enquiry field which appears when this option is checked.
- Enable Auto Closure of Enquiry – Enabling this option will automatically close the un-attended Enquiry which goes past the specified day(s) in the settings. Nafhaa system will identify such entries and close them.
- Enable Automatic Reassignment of Enquiry – Enabling this option will automatically re-assign the Enquiry to some other user defined in Re-assign to field after a certain minute(s) specified in Re-assign Enquiry after Minute(s). Nafhaa Engine will re-assign the Enquiries after regular intervals.
- Enable Multi-Assign in Enquiry – This will enable a Multi-assign field in Enquiry which will allow the user to assign multiple users to single entry.
- Enable Enable View To All in Enquiry – This will provide a new switch in Enquiry, where user can turn ON/OFF the setting for individual record of entry. Once, enabled, the marked the record will be visible to all the user, irrespective of the hierarchy level.
- Enable Requirements in Enquiry – This will enable Requirement section in the Enquiry, where the user can add multiple requirements against the Enquiry.