Appointments can be anything from visiting the customer or calling them over the phone for discussion on the specified agenda. This module will help the user schedule their visits or call for up-coming days.
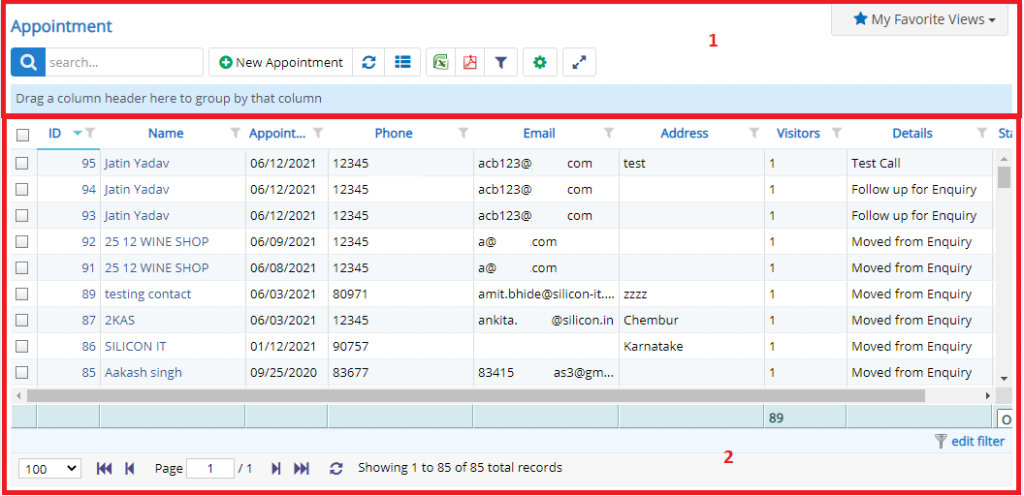
- Annotation – 1 shows few elements like Search, Refresh and Column Selector (will describe later in the chapter).
- Search Text box is used to search a specify or similar records form the list below. When you start entering characters it will start searching within the Appointment Module.
- Refresh Button is used to reload the Appointment Grid or Table so that the changes which are made to any user will be reflected on the grid.
- The next two buttons are for downloading the Appointment Grid as Excel or a PDF. These files will contain all the columns are which are visible in Appointment Grid.
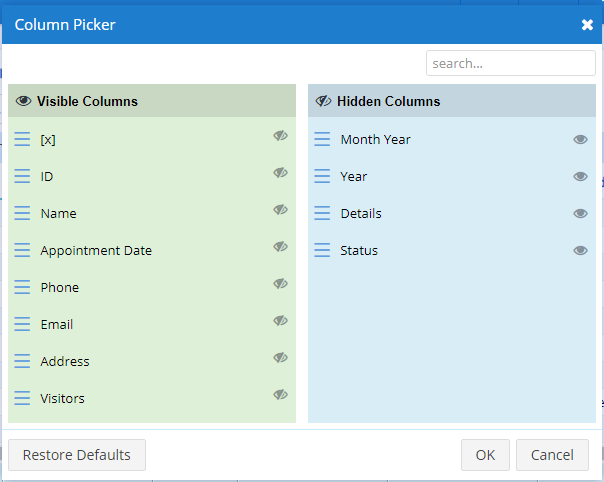
- Column Selector is used to select one or multiple columns from the range of columns. Following is the image for the Column selector. Note – The columns shown in the filter will keep on changing as and when Nafhaa Platform makes changes to the module.
- Annotation – 2 shows the list of all the Appointment records that have been received where the user can click record to open it and edit it if needed. This was all about the Appointment Grids introduction now let’s get inside the module.

- Starting from the left is the Update button which is used to update the changes that you have performed in any of the Tab. This button will change to Save when you are creating a new Entry.
- The Next button which is similar to Update button but the only difference is that, it performs the Update operation and remains on the same page. But the later Updates or Save and returns to the Grid displaying List of users. This button will change its meaning when you are creating a new entry. It will be called as Apply changes.
- The Next button is for Delete, this will delete the selected record from the database.
- The SMS button will help you to send the Appointment details to the client via SMS.
- The first tab is all about Appointment details, were you can specify the details of Appointment which is scheduled with the client. You can also select the product for which the appointment is scheduled.
Please Note – This Appointment module is different than the sub-modules present in each of the Major modules like the Enquiry, Sales, Sales Order, Quotation, etc are few to name where you can create an appointment. This module is generic in nature.
This sums up the Appointment Module. We hope that you have fair bit of knowledge on how to use and handle the Appointment Module.