The term “support ticket” describes the interaction between a customer and a service representative. It’s the basic element of any customer experience related job—allowing your business to create, update, and hopefully resolve any issues your end-users might have. Likewise, a good support ticketing system allows your organization to manage and maintain a list of common issues or questions that your customers may be having.
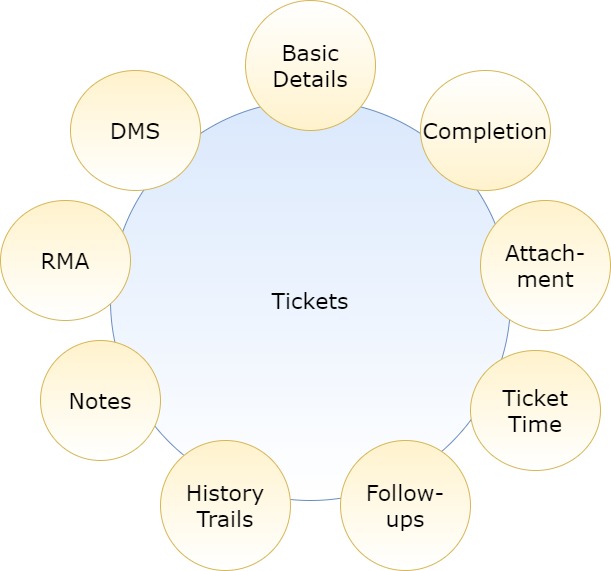
Modules included in this module. We haven’t shown Product as it is a default sub-section without which Tickets is incomplete.
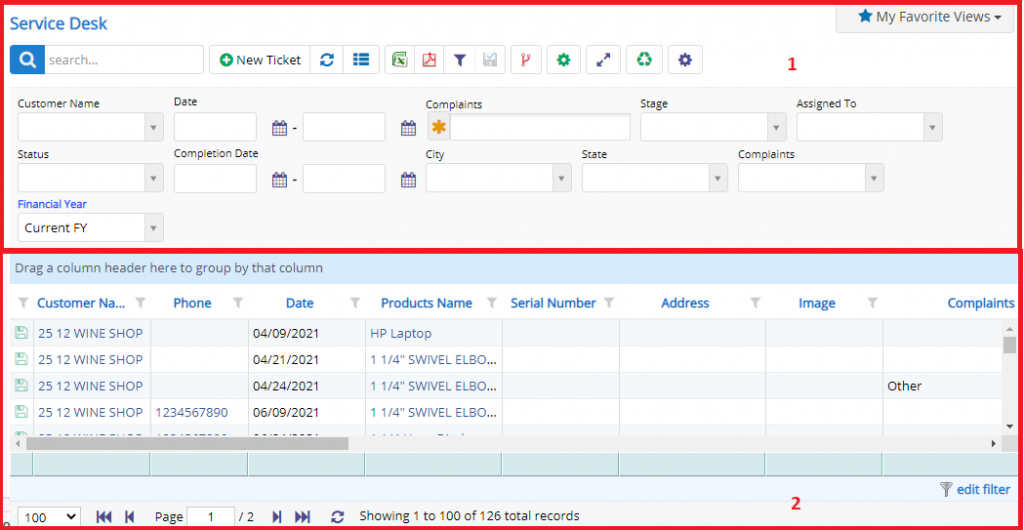
- Annotation – 1 shows few elements like Search, New Ticket, Refresh and Column Selector (will describe later in the chapter).
- Search Text box is used to search a specify or similar users form the list below. When you start entering characters it will start searching within the Ticket Module.
- Refresh Button is used to reload the Ticket Grid or Table so that the changes which are made to any user will be reflected on the grid.
- The Excel and PDF two buttons are for downloading the Ticket Grid as Excel or a PDF. These files will contain all the columns are which are visible Ticket Grid.
- Filters with drop-down feature for the fields like Customer Name are few to name. On the other hand, fields which deals with Dates are given two fields as a part of Date range selection. You can use these filters in combination to filter the records. You will need to click the Filter button to reveal the same.
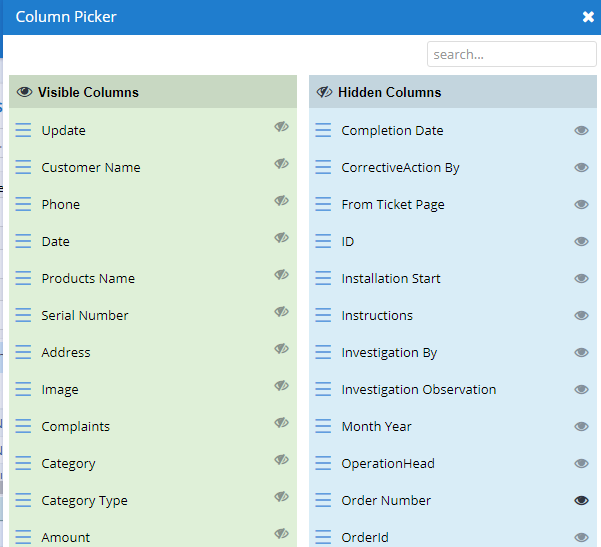
- Column Selector is used to select one or multiple columns from the range of columns. Following is the image for the Column selector. Note – The columns shown in the filter will keep on changing as and when Nafhaa Platform makes changes to the module.
- Annotation – 2 shows the list of all the Ticket records that have been created where the user can click record to open it and edit it if needed.
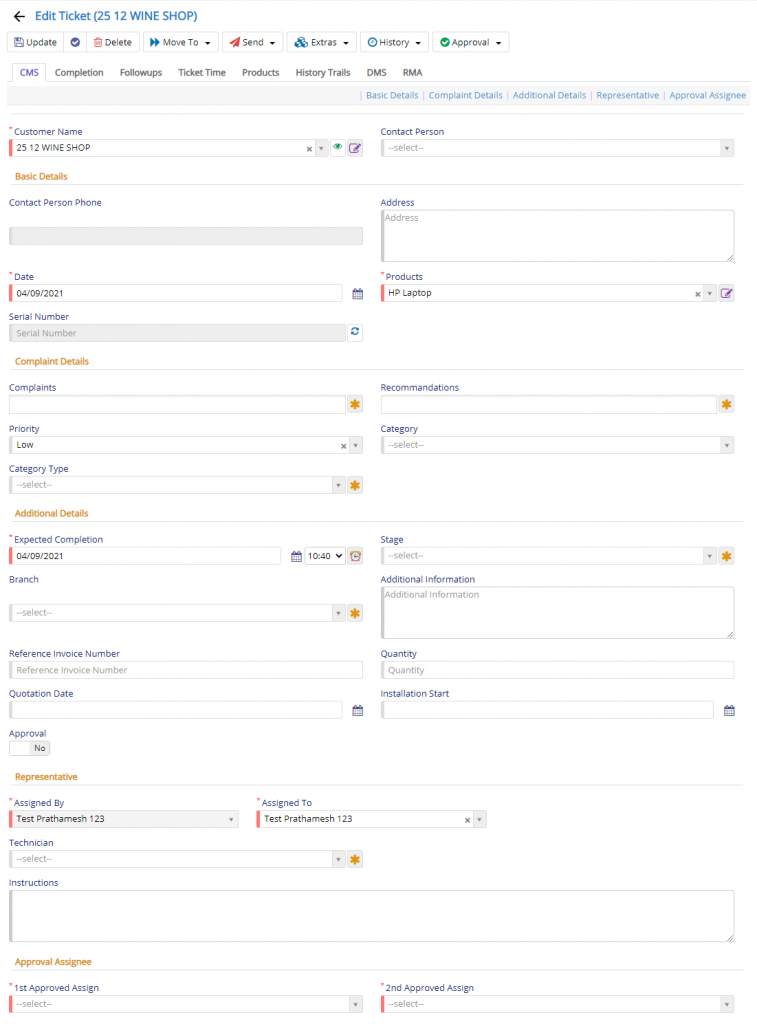
- Customer Name field will allow the user to select the Customer for whom the ticket is being created.
- Contact Person field will allow the user to select the Contact Person who is defined under the Customer Selected. This represents Sub-contact module under Contacts. This field will be visible only when settings is enabled.
- Some fields like Address, Contact Person phone will be auto-populated based on availability.
- Then user will have to select some compulsory fields like the Date, Product, Expected Completion, Assigned To and First and Second level approval users who will perform approval actions.
- Some other important fields like the Complaints where the user will be able to select multiple types of complaints associated with the product, Recommendations field will allow the user to specify recommendations related to Complaints which were logged, Category field will allow user to specify the same for further course of action to be taken.
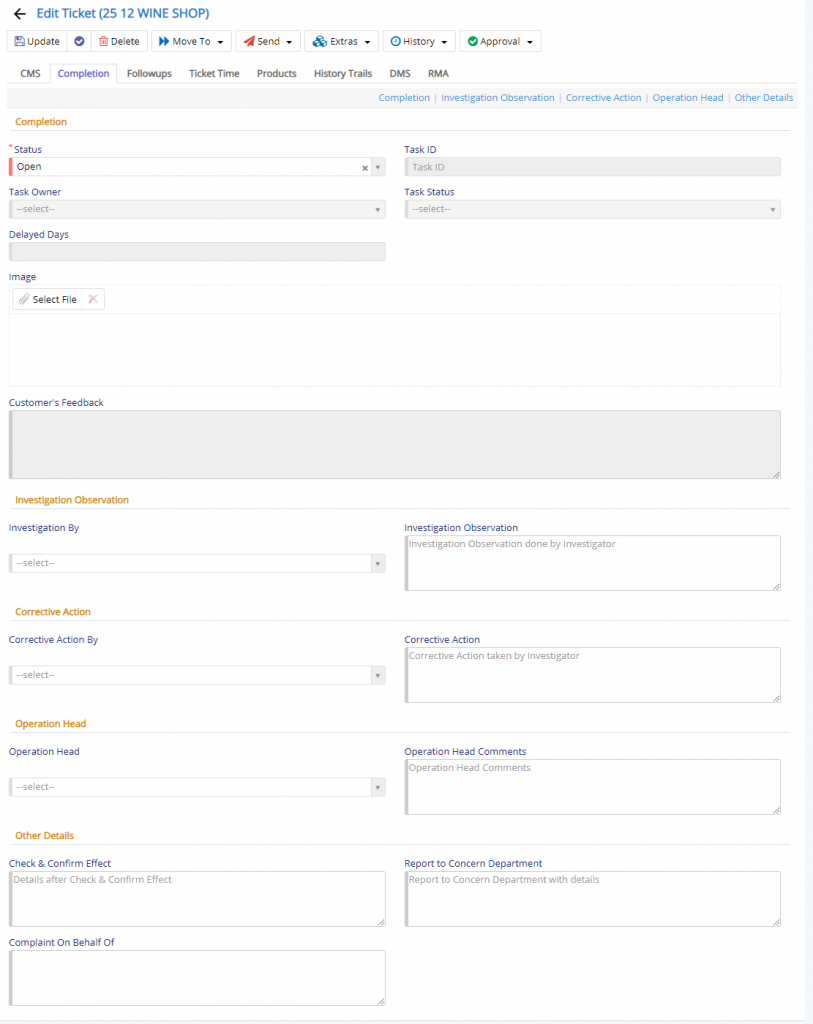
Completion Tab is important when the Ticket is closed and the user will have to update the Ticket with relevant details.
- Status field will allow the user to set the Status of Ticket based on the activity performed on the ticket.
- There some other fields which are vital but not compulsory but, setting those will help the internal team to understand the patterns about the issues and its corrective actions taken to resolve the same. Fields like Investigation By, Corrective Action By, along with fields like Investigation Observation and Corrective Action which contain details.
- Finally, some fields like Operation Head should represent the person who heads the Ticket Operation. At last, Check and Confirm Effect, Report to Concern Department will contain additional details.
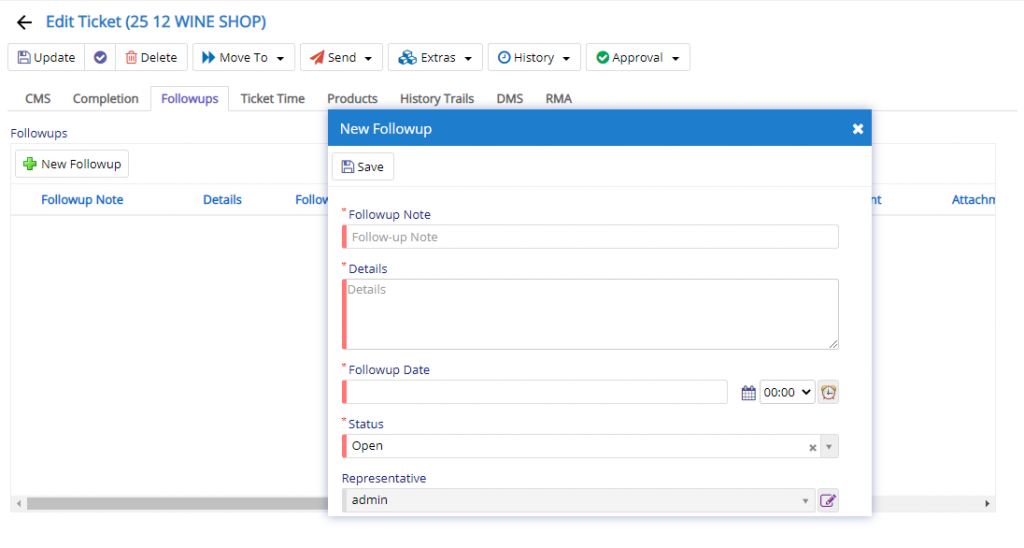
The next tab is for setting up Follow-ups with the current customer for the current Ticket. You can set multiple follow-ups for the current Ticket. This how the follow-up dialog will look when you start adding it. As you can see in the image, we have Grid which will show you the number of follow-ups happened for the current Ticket. Using the New Follow-up button, you can add new follow-up for the current Ticket. On clicking the button, you will be given with a new dialog as shown above where you can set the Follow-up Note and the Details for the Follow-up along with the proposed Date and Time with the Status. When the Follow-up is done with the customer or client users are expected to update the Follow-up accordingly.
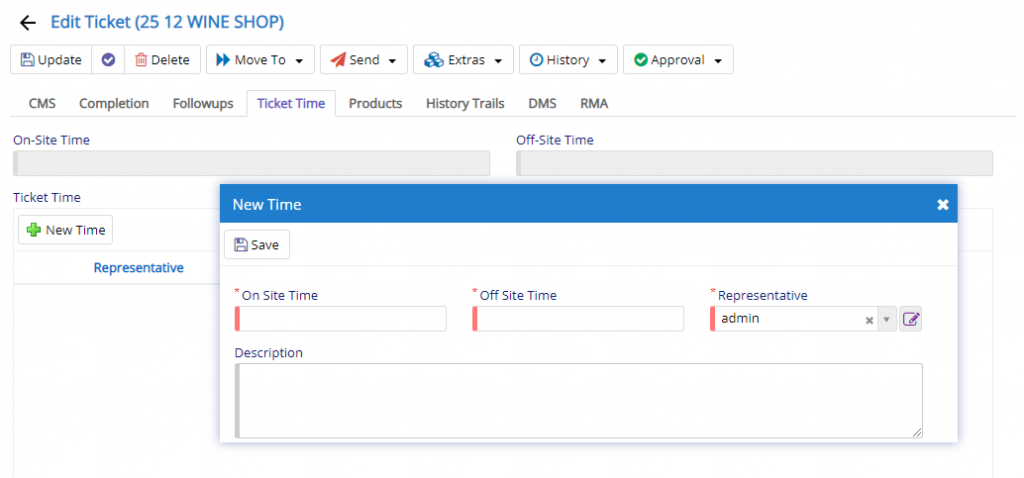
This tab completely optional and will enabled when it is turned on in Ticket Settings. The user will allowed to add multiple details about the time spent on the Ticket for resolutions. Total On-Site time and Off-site time will be calculated. This will allow the executives to understand the time required for a specific ticket to be resolved.
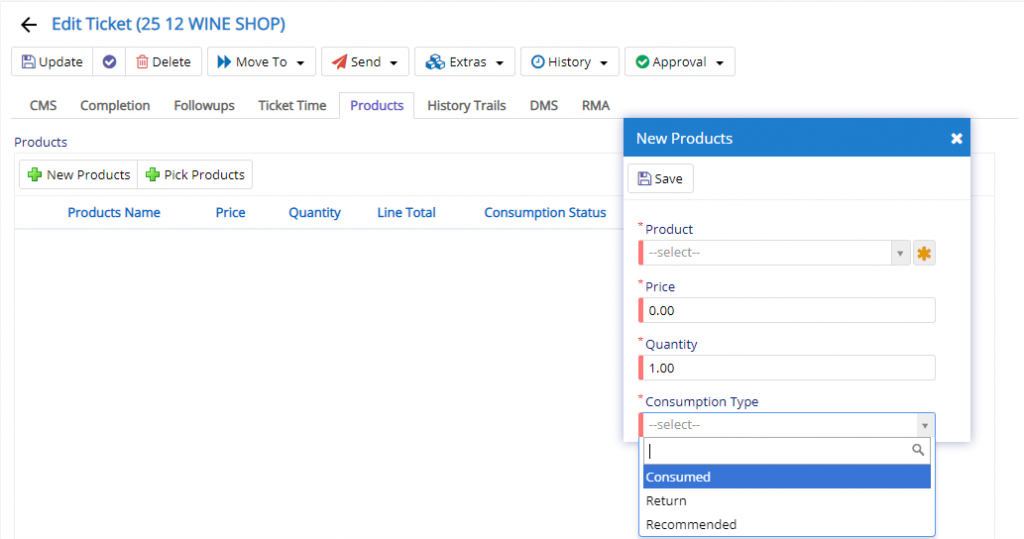
This tab will allow the user to add the products/part consumed, recommended or return for specific ticket to resolve the issues. All the products can be listed which are associated with the ticket. Those which are not used can be marked as return.

This section is visible under DMS Tab in Tickets. To view and use the same you will need to enable in from Company Details under Settings tab.
This section will allow the user additional documents if needed and they have exhausted the four attachment fields that are provided. This will link the upload data with the Ticket entry.
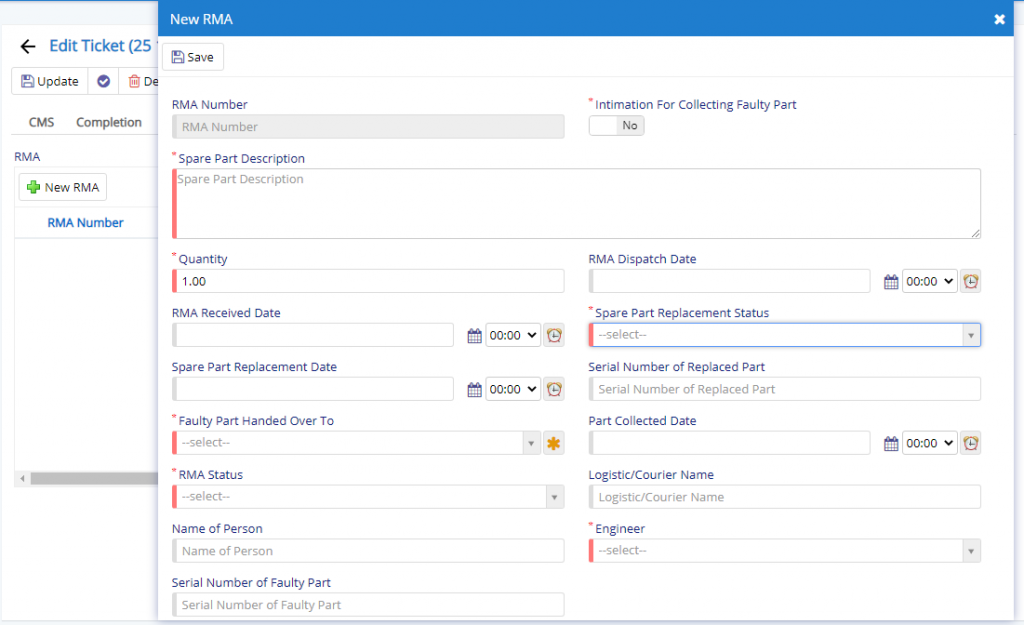
This tab is optional, you can enable this feature by enabling it in Ticket Settings if your business follows RMA practice. User will have to specify few details like Spare Part Description which contain the details of part which is to be replaced. Few other fields which are important and needs to be filled are Spare Part Replacement Status which will denote the status of spare part replacement for the ticket. Furthermore, fields like Faulty Part Handed-over To, Engineer and RMA Status which will allow the user to set User who has the faulty spare part along with the status of RMA.

- Starting from the left is the Update button which is used to update the changes that you have performed in any of the Tab. This button will change to Save when you are creating a new Entry.
- The Next button which is similar to Update button but the only difference is that, it performs the Update operation and remains on the same page. But the later Updates or Save and returns to the Grid displaying List. This button will change its meaning when you are creating a new entry. It will be called as Apply changes.
- The Next button is for Delete, this will delete the selected record from the database.
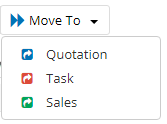
- Sales – Ticket will be moved to Sales module for further processing.
- Task– Ticket will be moved to Task module for further processing and which can be attended by assigned personnel.
- Quotation – Ticket will be moved to Quotation module for further processing and generation of Quotations.
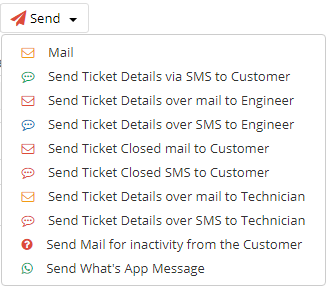
Send button has lots of options which are visible based on permissions and settings where are assigned or turned on respectively.
- Send Ticket Details to Customer – Using this feature user can send details of Ticket to registered customer using Email Id, Phone number via Email, SMS and Whats App.
- Send Ticket Details to Engineer – Using this feature user can send details of Ticket to Engineer (a user) using Email Id, Phone number via Email, SMS.
- Send Ticket Details to Technician- Using this feature user can send details of Ticket to Technician (a user) using Email Id, Phone number via Email, SMS.
To use Whats App feature make sure you enable either Gupshup or Twilio integration with Nafhaa to use this feature.
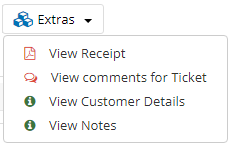
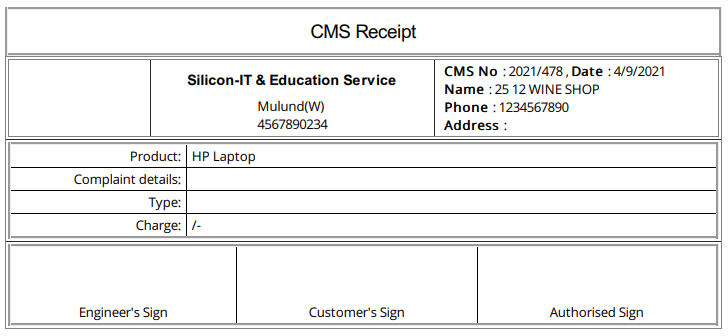
- View Receipt will allow the user to see the Receipt generated for the Ticket. This is useful when the Ticket type is chargeable. Show below is a sample for the same.
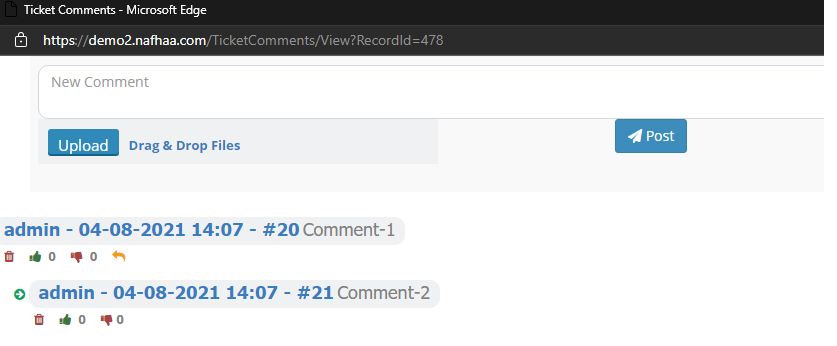
- View Comments will allow the customer and users to add comments to the tickets generated by Customer. Internal users can view the same. This options is available when setting is turned on.
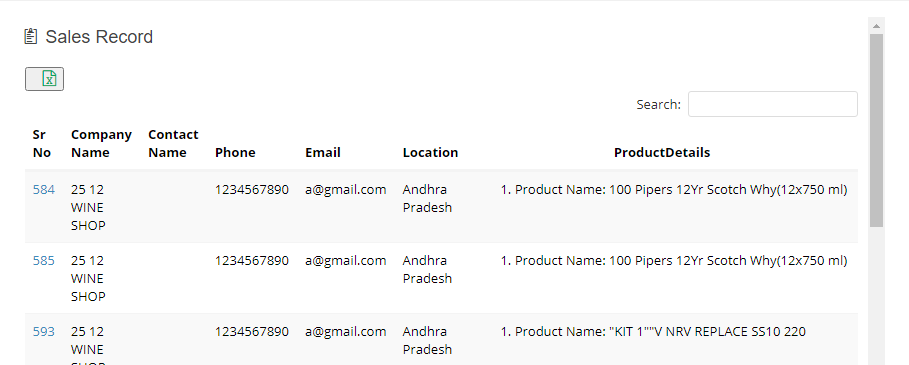
- View Customer Details will allow the user to view all the sales against the Customer selected.
- View Notes will allow the user to add/update notes. This is similar to all other modules.
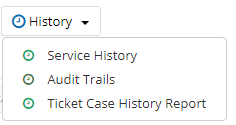
- Service History will allow the user to view Service offered to the selected customer.
- Audit Trail will allow the user to view all the modifications/update done to a specific ticket record.
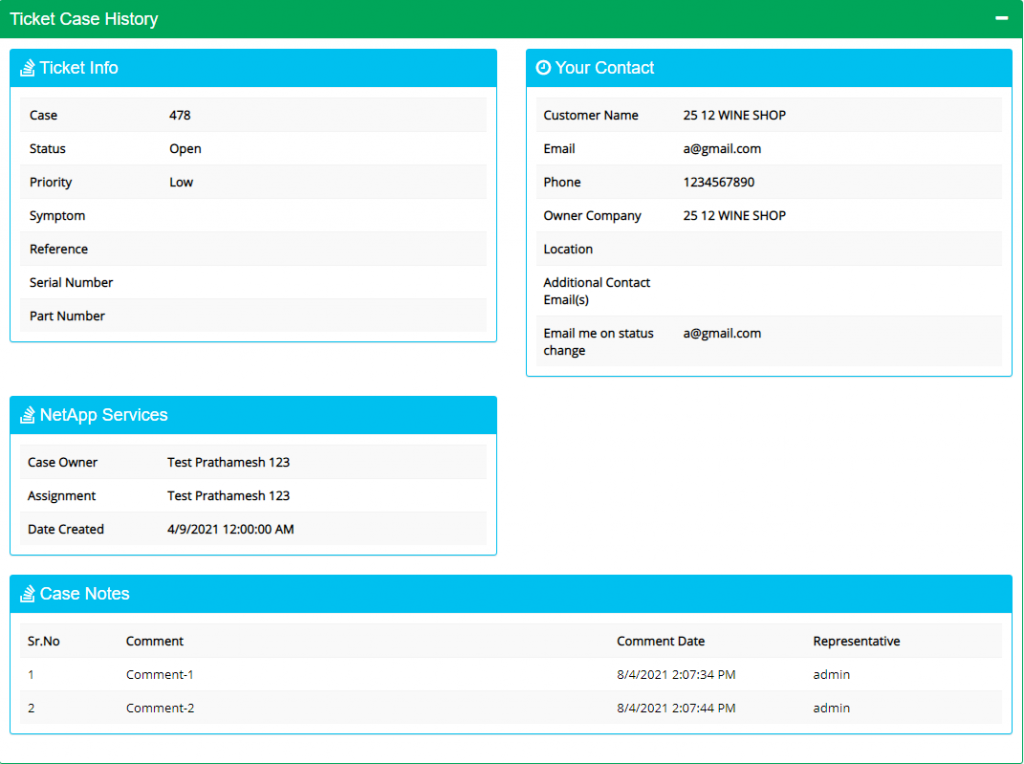
- Ticket Case History Report will allow the user to view all History for the ticket that is currently being viewed.
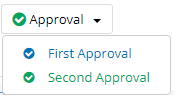
Approval buttons will be visible based on setting and permissions granted to user.
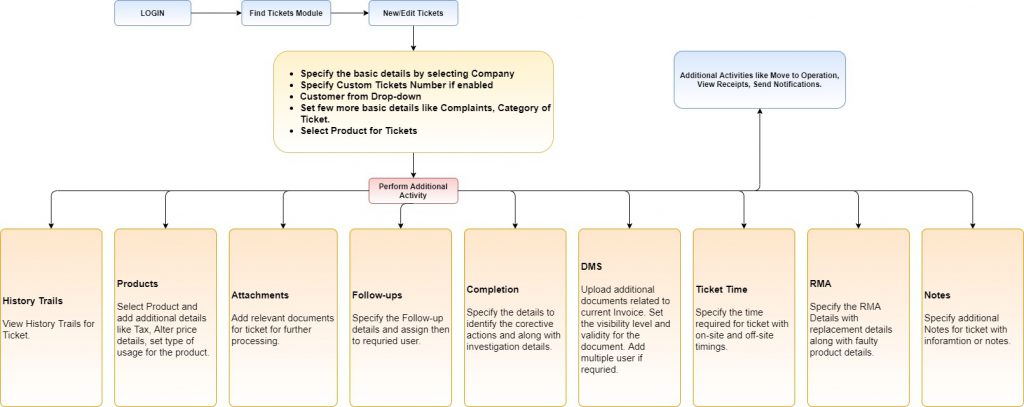
Generalized flow of Tickets Module